


How to Unlock a Disabled iPad Without Losing Data [2026]
- Timer still active + know the correct passcode: Wait for another attempt and enter it carefully. No erase.
- Recently changed your passcode: On iPadOS 17+, check whether your Previous Passcode is still valid.
- Completely forgot the passcode: You will usually need to erase or restore the iPad.
- Already have a backup: Resetting still erases the iPad, but you can restore data included in that backup afterward. This is not the same as a no-data-loss unlock.
If your iPad is disabled, you may worry about losing important photos, messages, and files. The good news is that some recovery options can preserve your data, while others require erasing the device.
This guide explains how to unlock a disabled iPad without losing data, and what to do if a reset is required. If you are unsure which disabled state your iPad is in, see our complete guide on how to unlock a disabled iPad.
- Check These No-Data-Loss Options First
- Can You Unlock an iPad Without a Passcode Without Resetting It?
- What If You Completely Forgot the Passcode?
- Before You Erase: Check for Existing Backups
- How to Restore Your Data After the iPad Is Erased
- FAQs About Unlocking a Disabled iPad Without Losing Data
- Conclusion
Check These No-Data-Loss Options First
Before erasing the iPad, check whether either of these options is still available.
Option 1. Wait and Enter the Correct Passcode
If your iPad still shows a countdown and you are confident that you know the correct passcode, wait until the timer finishes. When another attempt becomes available, enter the passcode carefully. A normal unlock does not erase the iPad.
If you are unsure of the passcode, do not keep guessing. More incorrect attempts can trigger longer delays or eventually make normal passcode entry unavailable.
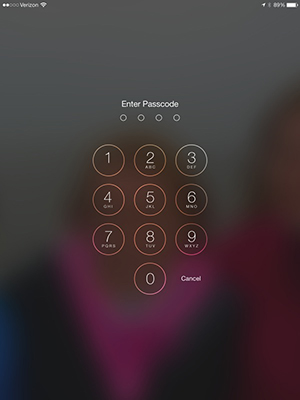
Option 2. Use Previous Passcode on iPadOS 17+
If you changed your passcode recently and forgot the new one, iPadOS 17 or later may allow you to use your previous passcode for up to 72 hours after the change.
When the iPad reaches the iPad Unavailable screen and Forgot Passcode? appears:
- Step 1. Tap Forgot Passcode?
- Step 2. Tap Enter Previous Passcode.
- Step 3. Enter the previous passcode and follow the prompts to create a new one.
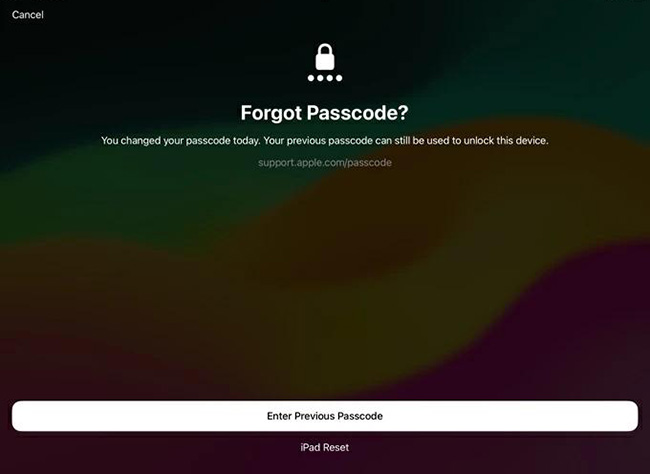
The 72-hour period starts when you change the passcode. The previous passcode must still be within that window and must not have been manually expired earlier. To access Forgot Passcode? on the locked screen, the iPad must also be online, signed in to an Apple Account, and have Find My enabled.
 Note
Note
Previous Passcode belongs to Apple's newer iPad Unavailable recovery flow rather than the traditional older iPad is Disabled interface. If your screen shows one of these newer messages, see our complete iPad Unavailable guide.
Can You Unlock an iPad Without a Passcode Without Resetting It?
If you do not know any valid passcode, usually no. There is no supported way to remove the iPad screen lock without resetting or erasing the device. One exception is when iPadOS 17 or later still accepts your Previous Passcode within the 72-hour window. In that case, you can regain access without resetting the iPad.
What If You Completely Forgot the Passcode?
If neither the correct current passcode nor an eligible Previous Passcode is available, you will usually need to erase or restore the iPad to remove the forgotten screen lock. Before doing so, check whether you already have an iCloud or computer backup. After the iPad is erased, you can restore your data from an existing backup during setup.
| Method | Data Erased? | Main Requirements | Best When |
|---|---|---|---|
| Lock-Screen Reset | Yes | Newer iPadOS, internet, Apple Account, Find My | Reset option appears on screen |
| Find My | Yes | Find My enabled beforehand | Remote erase is available |
| Recovery Mode | Yes | Mac/PC, cable, internet | Other recovery options are unavailable |
| TunesKit iPhone Unlocker | Yes | Mac/PC and USB cable | Prefer a guided desktop workflow |
Reset the iPad from the Lock Screen
Newer iPadOS versions may let you reset the locked iPad directly without a computer.
On iPadOS 17 or later, tap Forgot Passcode? and start the iPad reset. On iPadOS 15.2–16, look for Erase iPad instead.

The iPad must have an active Wi-Fi or cellular connection, be signed in to an Apple Account, and have Find My enabled beforehand. You will also need the Apple Account password to complete the erase. This method removes the forgotten passcode by erasing the iPad. Afterward, you can restore an existing backup if one is available.
If your device still shows the traditional iPad is Disabled interface, this newer Lock Screen reset option may not be available.
Erase the Disabled iPad with Find My
If Find My was enabled before the iPad became disabled, you can remotely erase it.
- Step 1. Go to iCloud.com/find and sign in with the Apple Account linked to the iPad.
- Step 2. Select the disabled iPad.
- Step 3. Choose Erase This Device and confirm the request.
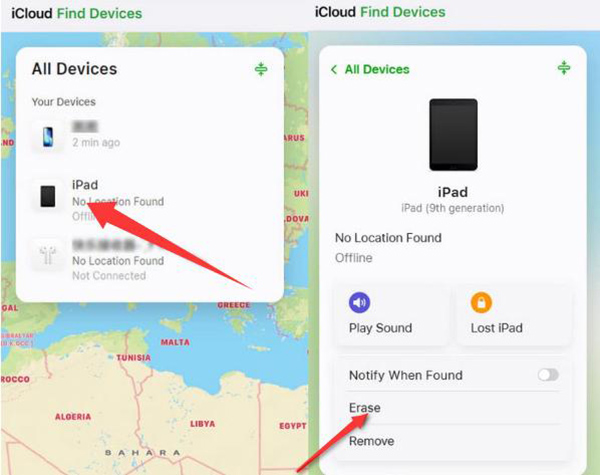
If the iPad is offline, the erase remains pending until it reconnects to the internet. A Find My remote erase deletes the current device data. Activation Lock remains enabled, so the linked Apple Account password will still be required to reactivate the iPad.
 For detailed instructions, see how to unlock a disabled iPad using Find My.
Restore the Disabled iPad in Recovery Mode
If the Lock Screen reset and Find My are unavailable, use Recovery Mode with a computer.
Use Finder on Mac or Apple Devices on Windows. Older supported setups may still use iTunes.
- Step 1. Turn off the disabled iPad.
- Step 2. Connect it to the computer and use the correct button sequence for your model to enter Recovery Mode.
- Step 3. Open Finder or Apple Devices and select the iPad.
- Step 4. Choose Restore and wait for iPadOS to reinstall.
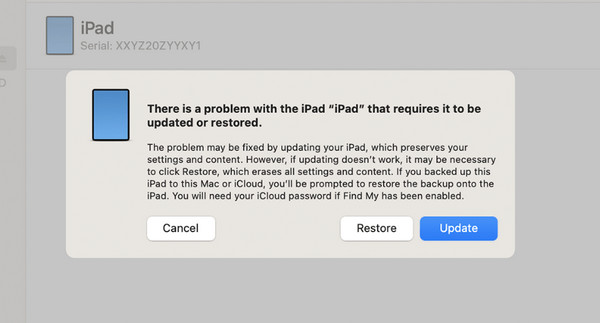
Recovery Mode removes the forgotten passcode by erasing the current data and settings. If your screen specifically says "iPad is Disabled, Connect to iTunes," see our detailed guide to fixing iPad Is Disabled, Connect to iTunes.
Use TunesKit iPhone Unlocker
If you prefer a guided desktop workflow, TunesKit iPhone Unlocker is a professional tool to help remove supported screen locks from a disabled iPad within a few clicks only. Using the Unlock iOS Screen mode does not automatically remove Activation Lock, so the linked Apple Account may still be required during setup.
- Step 1. Connect the iPad to a Mac or Windows PC and choose Unlock iOS Screen.
- Step 2. Follow the onscreen instructions and download the matching firmware package.
- Step 3. Click Unlock to start removing the screen passcode.

Before You Erase: Check for Existing Backups
Before using any erase or restore method, check whether you already have an iCloud or computer backup.
Do not assume that you can create a new backup after the iPad has become disabled. Creating a computer backup can require the screen passcode or a Trust This Computer confirmation, which may not be possible while the iPad is locked.
Check for an Existing iCloud Backup
You can check whether an iCloud backup exists for the iPad from another Apple device, Mac, or Windows PC signed in to the same Apple Account.
For example, on another iPhone or iPad, go to Settings > your name > iCloud > iCloud Backup.
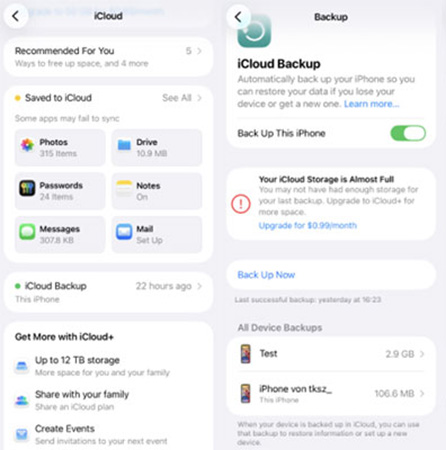
Confirm that a backup for the affected iPad exists. After the disabled iPad is erased and you reach setup, compare the available backups by date and size before choosing one to restore.
Remember that anything created after the selected backup may not be included.
Check for an Existing Computer Backup
If you previously backed up the iPad to a Mac or Windows PC, check the computer for an existing local backup. You can use Finder or Apple Devices to manage available backups when accessible, or check the computer's backup location directly.
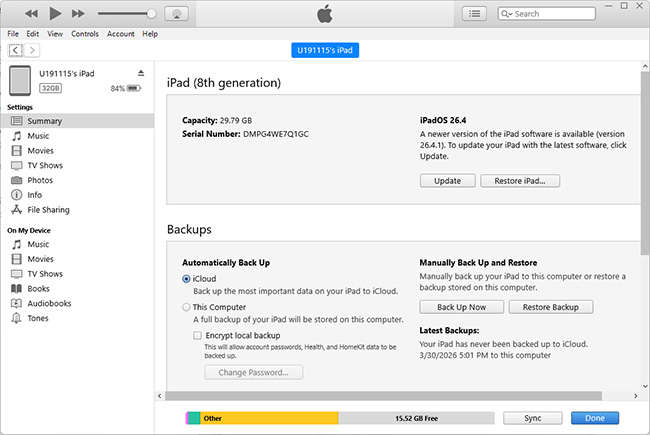
If the backup is encrypted, you will need its encryption password when restoring it. A computer backup itself can restore only the data included in that backup.
How to Restore Your Data After the iPad Is Erased
Once the iPad has been reset, you can restore an existing backup during setup.
Restore from an iCloud Backup
- Step 1. Turn on the erased iPad and begin the setup process.
- Step 2. At the Transfer Your Apps & Data screen, choose From iCloud Backup.
- Step 3. Sign in to your Apple Account.
- Step 4. Choose the appropriate backup based on its date and size.
The initial restore will begin, while some apps and cloud content may continue downloading afterward.

Restore from a Computer Backup
If you previously backed up the iPad to a computer:
- Step 1. Connect the erased iPad to your Mac or Windows PC.
- Step 2. Open Finder or Apple Devices and select the iPad.
- Step 3. Choose Restore Backup.
- Step 4. Select the backup you want to restore.
If the backup is encrypted, enter the backup password when requested.

Restoring a backup only returns information that was included in that backup. It does not recover newer local data that was never backed up or synced elsewhere.
FAQs About Unlocking a Disabled iPad Without Losing Data
-
Can I recover data if I never made a backup?
If you cannot unlock the iPad with a valid passcode and the device must be erased, local data that was never backed up generally cannot be restored afterward. However, information that was already syncing separately with iCloud may return after you sign in again.
-
Does Previous Passcode work on an older "iPad is Disabled" screen?
No. Previous Passcode requires iPadOS 17 or later and is available through the newer iPad Unavailable recovery flow. It is available for up to 72 hours after a passcode change when the required conditions are met.
-
Is iCloud Sync the Same as iCloud Backup?
No. iCloud Sync keeps supported data such as certain photos, contacts, notes, and files synchronized with iCloud, while iCloud Backup stores a device backup that can be restored after the iPad is erased. Some synced data may return after you sign in even if you do not have a full iCloud Backup.
Conclusion
To unlock a disabled iPad without losing data, check the no-erase options first: wait for another attempt if you know the correct passcode, or use Previous Passcode when eligible on iPadOS 17 or later. If neither option works, you will generally need to erase the iPad, so check for an existing backup before proceeding and restore it during setup.
For other disabled-screen messages and recovery situations, see our complete disabled iPad guide.