


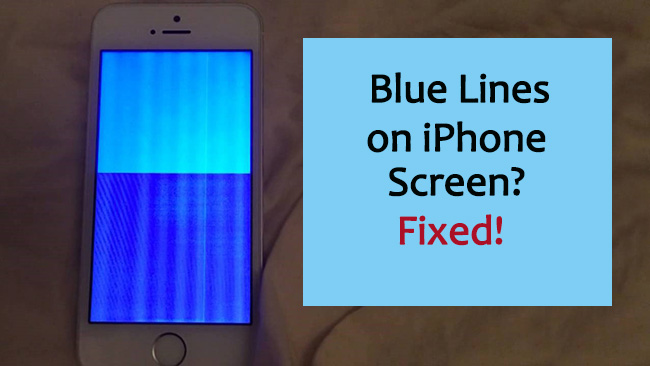
Blue Line on iPhone Screen? Try These Fixes!
"I recently updated my iPhone 17 to the latest iOS 26.5, and soon after, I began experiencing a blue line on the iPhone screen. It is impossible to make calls or reply to text messages. Any reason why it happened? And how can I fix it? Please help!"
If you see blue lines on the iPhone screen, it means that something is wrong with your iPhone. However, you don't have to be scared. Many iPhone users have reported that they're experiencing the same problem after software updates. To end your misery, this article explores a few reasons why it happens and how to fix the issue effectively.
- Why Is There a Blue Line on My iPhone?
- How to Fix Blue Lines on iPhone Screen
- Fix 1: Force Restart Your iPhone
- Fix 2: Clean the Screen
- Fix 3: Turn Off Switch Control
- Fix 4: Toggle Auto-Brightness and True Tone
- Fix 5: Reset All Settings
- Fix 6: Update Your iPhone iOS System
- Fix 7: Enter iPhone into DFU Mode
- Fix 8: Fix Blue Line on iPhone Screen Without Data Loss HOT
- Fix 9: Ask Apple Support for Help
- FAQs About Blue Lines on iPhone screen
- Conclusion
Why Is There a Blue Line on My iPhone?
A sudden blue line on your screen usually points to a physical hardware failure, an underlying software bug, or an accidental settings change. Identifying the root cause is essential for applying the correct fix. Here are the three primary culprits:
- 01 Hardware Damage: Dropping your device can permanently fracture the LCD/OLED panel or loosen internal flex cables, creating stationary vertical lines.
- 02 Accessibility Settings: A moving blue line or scanning box is not a defect. It simply means you accidentally activated the built-in "Switch Control" feature. See quick solution >
- 03 Software Glitches: Corrupted iOS updates or deep system conflicts can disrupt visual data, leading to persistent display errors or flickering.
How to Fix Blue Lines on iPhone Screen
So, how do you go about fixing the blue vertical line on your iPhone? Well, we have got you covered, and here are some basic fixes you should try out!
Fix 1: Force Restart Your iPhone
Force restart is an excellent fix for most iPhone problems. A simple restart provides your iPhone with a fresh start eliminating all app conflicts and occurring bugs that may cause the blue line on your screen.
Here is how you can force restart your iPhone depending on the model you are using.
- iPhone 8 and recent models: Press and quickly release the Volume Up button, then the Volume Down. Finally press and hold the Side button until an Apple logo shows on your screen.
- iPhone 7 and iPhone 7 Plus: Press and hold the Volume and Side buttons simultaneously until an Apple logo displays at the center of your iPhone screen.
- iPhone 6s and earlier models: Press and hold the Home and Top buttons at the same time until an Apple logo flashes on your screen.

Fix 2: Clean the Screen and Remove Accessories
Sometimes, trapped moisture, dirt, or a cracked screen protector can apply uneven pressure on your iPhone's display, leading to visual glitches. Before assuming the worst, power down your device and carefully remove your phone case and screen protector.
Gently clean the bare screen with a soft, dry microfiber cloth to ensure no debris is interfering with the display sensors. If the blue line persists after turning the phone back on, you are likely dealing with an internal hardware or software issue.

Fix 3: Turn Off Switch Control
If you accidentally enabled the Switch Control accessibility feature, you might see a moving blue line or box scanning across your iPhone screen. This is entirely software-based and very simple to disable. Follow these updated instructions to turn it off and clear the screen.
- Step 1. Open the Settings app from your iPhone's home screen.
- Step 2. Scroll down the main menu and tap directly on Accessibility.
- Step 3. Tap on Switch Control and ensure the toggle at the top of the screen is turned off.

Fix 4: Toggle Auto-Brightness and True Tone
Sometimes, iOS display algorithms fail to calibrate properly after a reboot. This failure can cause temporary visual artifacts, weird color distortions, or random lines to appear. Toggling features like True Tone and Auto-Brightness forces the display driver to refresh its color output and instantly recalibrate.
- Step 1. Open Settings and navigate to Display & Brightness.
- Step 2. Toggle True Tone off, wait a few seconds, and toggle it back on.
- Step 3. Next, go to Settings > Accessibility > Display & Text Size and toggle Auto-Brightness to force a complete screen recalibration.

Fix 5: Reset All Settings
Many users hesitate to perform a full system restore, making a complete settings reset a highly effective compromise. This method clears out customized configurations, network connections, and display preferences.
Best of all, it does not delete your personal photos, apps, or messages. It is a fantastic intermediate step to rule out deep-seated software conflicts that a basic restart cannot fix.
- Step 1. Go to Settings > General > Transfer or Reset iPhone.
- Step 2. Tap Reset at the bottom of the screen.
- Step 3. Select Reset All Settings and enter your passcode to confirm.

Fix 6: Update Your iPhone iOS System
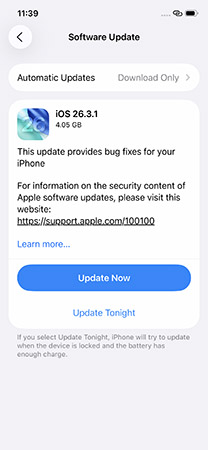
Running an outdated version of iOS can sometimes cause unexpected software glitches, including strange visual anomalies on your display. Apple frequently releases system updates specifically designed to patch these bugs and improve overall device stability. Installing the latest firmware is a crucial troubleshooting step to rule out software-related screen issues.
- Step 1. Connect your iPhone to a stable Wi-Fi network and ensure it has sufficient battery life.
- Step 2. On your device, go to Settings and tap on General.
- Step 3. Tap on Software Update to let your phone check for the latest firmware.
- Step 4. If an update is available, tap Download and Install or Update Now.
- Step 5. Enter your passcode when prompted and wait for the installation process to finish.
Fix 7: Enter iPhone into DFU Mode
When standard software updates fail to resolve the blue lines on your display, a more advanced solution is putting your device into Device Firmware Update (DFU) mode. This process completely bypasses the current operating system, allowing your computer to reinstall the underlying firmware from scratch. You must back up your data before proceeding, as this aggressive method will completely erase all personal files and settings from your smartphone.
Here is how to perform this on modern devices ranging from the iPhone 8 to the newest models.
- Step 1. Connect your iPhone to your computer using a certified Apple cable and launch either iTunes (for Windows) or Finder (for Mac).
- Step 2. Press and quickly release Volume Up, then immediately press and quickly release Volume Down.
- Step 3. Press and hold the Side power button until the display turns completely black.
- Step 4. The moment the screen goes black, press and hold both the Side button and the Volume Down button together for exactly five seconds.
- Step 5. Release only the Side button, but continue holding the Volume Down button for about ten more seconds until your computer displays a prompt stating it has detected a device.
- Step 6. If your screen remains pitch black, you are successfully in DFU mode and can now click Restore iPhone on your computer to reinstall the system and potentially clear the screen glitch.

Fix 8: Fix Blue Line on iPhone Screen Without Data Loss
Putting your iPhone into DFU mode carries a significant risk of permanently losing your personal data and custom settings. The manual recovery process is also quite complex and time-consuming, especially if you have not created a recent backup. Fortunately, there is a much safer and user-friendly alternative to resolve these persistent display glitches.
Having ruled out physical hardware damage, a stubborn blue line is almost certainly the result of a severe system failure that requires specialized intervention.
To repair the operating system without wiping your device, we highly recommend using a dedicated recovery tool like TunesKit iOS System Recovery. This professional-grade software is specifically engineered to resolve deep-rooted iOS issues, including iPod stuck in boot loop, black screens, and visual glitches like blue lines.
Key Advantages of TunesKit iOS System Recovery:
Repairs iOS system errors with zero data loss. Fully updated to support the latest iOS 26 firmware on Mac and Windows. Offers both Standard and Deep Repair modes to guarantee a high success rate.
 600,000+ Downloads
Here is a complete guide on how to fix the blue line on iPhone problem using TunesKit iOS System Recovery.
- Step 1. Launch TunesKit iOS System Recovery on your computer. Connect your iPhone to the computer via an Apple USB cable. The iPhone will automatically be detected. Click iOS System Repair > Start button to move.

- Step 2. Select the Standard Repair and hit the Next button. Then follow the interface's instructions to put your device into DFU mode.

- Step 3. TunesKit will display the specific details of the firmware package. Check to confirm if the specifics match those of your iPhone. Please make the necessary changes if anything is wrong. Then, click the Download button to begin the firmware download process.

- Step 4. After the download process is complete, click Repair, and TunesKitwill automatically begin to fix your iPhone's software system glitch that may cause the blue lines on your iPhone. Wait for the process to complete and restart your iPhone to see if the blue line on screen problem is fixed.

Fix 9: Contact Apple Support for Professional Help
If you have exhausted all software troubleshooting methods and the blue lines remain, it is time to seek professional assistance. Persistent visual glitches that survive a DFU restore are almost certainly caused by physical hardware damage.
We strongly advise against opening the iPhone yourself. Attempting a DIY repair without specialized tools can easily puncture the lithium-ion battery or sever delicate internal cables, worsening the situation and completely voiding your Apple warranty. Instead, schedule an appointment at your local Apple Store or contact an Apple Authorized Service Provider.

FAQs About Blue Lines on iPhone screen
-
Can a screen protector or case cause those blue lines?
It is highly unlikely. However, an extremely tight case or an improperly installed screen protector could apply excessive pressure to the display edges. You can quickly remove all accessories from your phone to see if the visual issue resolves.
-
Is this problem covered by warranty or AppleCare+?
AppleCare+: Usually yes, even if it's accidental damage (subject to deductible). Standard warranty: Only if there's no physical or liquid damage.
-
Can I keep using my iPhone with blue lines?
Yes, you can safely keep using your device as long as the screen still responds to touch. Just be aware that if the line is due to hardware damage, it will likely worsen over time. A single line often expands and can eventually lead to a completely unresponsive or black screen.
Conclusion
The above-listed solutions have proven very useful in fixing the blue lines on iPhone screen. It is now your job to find the perfect solution to remedy the problem on your iPhone. However, it is worth noting that some methods may lead to data loss. Therefore, we highly recommend trying TunesKit iOS System Recovery, as it is easy to use, guarantees 100% data safety, and works incredibly fast to fix the problem.


