


Top 8 Solutions to Fix iPad Says No Service
If your iPad says No Service or keeps showing No Service in the status bar, it means the device cannot connect to your cellular carrier. This may happen because of network outages, SIM or eSIM issues, incorrect cellular settings, outdated carrier settings, or iPadOS glitches. In this guide, we'll explain why No Service appears on iPad and show you eight practical ways to fix the problem and restore your cellular connection.

- Why Does My iPad Say No Service
- Video Tutorial: Fix iPad No Service
-
8 Ways to Fix iPad No Service
- Fix 1: Check Cellular Coverage and Reconnect to the Network
- Fix 2: Check Your Cellular Plan, SIM, or eSIM
- Fix 3: Restart Your iPad
- Fix 4: Update Carrier Settings
- Fix 5: Update iPadOS
- Fix 6: Reset Network Settings
- Fix 7: Repair iPadOS with TunesKit iOS System Recovery HOT
- Fix 8: Contact Your Carrier or Apple Support
- Final Words
Why Does My iPad Say No Service
If your iPad says No Service, the problem can come from either the cellular network, device settings, software, or hardware. Common causes include:
- 01 Temporary carrier or network outages
- 02 Weak or unavailable cellular coverage
- 03 SIM or eSIM connection problems
- 04 Incorrect cellular or network settings
- 05 Outdated carrier settings or iPadOS
- 06 Temporary iPadOS glitches or update errors
- 07 Hardware damage affecting the antenna or cellular components
 Further Reading: iPhone No Service After iOS 26/27 Update? Try These Fixes!
Video Tutorial: Fix iPad No Service
Prefer a visual guide? Watch the video below to learn how to fix iPad No Service. Follow the steps to troubleshoot cellular connection issues and get your iPad back online.
8 Ways to Fix iPad No Service
When your iPad says No Service, start with basic cellular checks before moving on to network resets or system repair. The following solutions are arranged from simple troubleshooting steps to more advanced fixes.
Fix 1: Check Cellular Coverage and Reconnect to the Network
Poor cellular coverage or a temporary carrier outage can cause No Service on iPad even when there is nothing wrong with the device itself. Before changing any settings, make sure cellular service is available in your current location.
- Step 1. Move to an open area or another location where your carrier normally provides cellular coverage.
- Step 2. Open Settings and turn on Airplane Mode.
- Step 3. Wait at least 15 seconds, then turn Airplane Mode off. Your iPad will try to reconnect to the cellular network.
- Step 4. If you are traveling internationally and your cellular plan supports roaming, go to Settings > Cellular Data > Cellular Data Options and turn on Data Roaming.
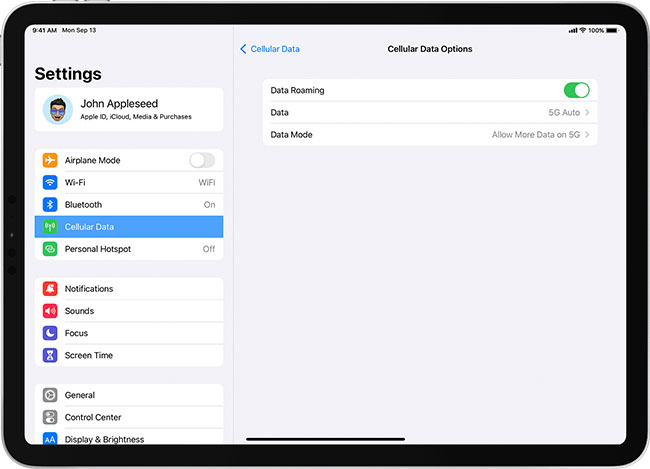
Keep in mind that international roaming may result in additional carrier charges.
Fix 2: Check Your Cellular Plan, SIM, or eSIM
An inactive cellular plan or a problem with the SIM or eSIM can also make an iPad show No Service. The steps vary depending on whether your iPad uses a physical SIM or eSIM.
- Step 1. Go to Settings > Cellular Data and make sure Cellular Data is turned on.
- Step 2. Check whether your cellular plan appears under the available plans and is active.
- Step 3. If your iPad uses an eSIM and the plan is missing or cannot be activated, contact your carrier to reactivate or reinstall the eSIM.
- Step 4. If your iPad has a physical SIM tray, remove the SIM card and carefully insert it again. Make sure the SIM sits correctly and the tray closes completely.
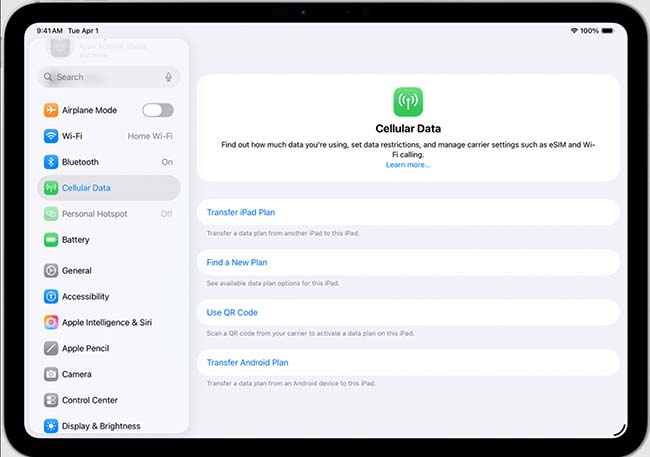
Newer iPad models may use eSIM exclusively, so you will not see a physical SIM tray on those devices.
Fix 3: Restart Your iPad
A restart refreshes iPadOS and forces the device to reconnect to available networks. It is particularly useful when the iPad No Service issue appears suddenly after switching networks, changing locations, or modifying cellular settings.
For an iPad without a Home Button:
- Step 1. Press and hold the top button and either volume button until the power-off slider appears.
- Step 2. Drag the slider and wait about 30 seconds for the iPad to turn off.
- Step 3. Press and hold the top button again until the Apple logo appears.

For an iPad with a Home Button:
- Step 1. Press and hold the top button until the power-off slider appears.
- Step 2. Drag the slider and wait about 30 seconds.
- Step 3. Hold the top button until the Apple logo appears.

After the iPad restarts, check the status bar to see whether cellular service has returned.
Fix 4: Update Carrier Settings
Carrier settings control how your iPad communicates with your network. An outdated configuration can affect cellular connectivity, especially after inserting a new SIM, activating an eSIM, or when your carrier changes its network configuration.
- Step 1. Connect your iPad to Wi-Fi.
- Step 2. Go to Settings > General > About.
- Step 3. Stay on the About screen for a few seconds.
- Step 4. If a carrier settings update is available, tap Update and follow the onscreen instructions.

If you've changed carriers or installed a new SIM or eSIM, your iPad may also need to download the new carrier's settings.
Fix 5: Update iPadOS
Software bugs or compatibility problems in an older version of iPadOS may interfere with cellular connectivity. Installing the latest available system update can resolve known network-related issues.
- Step 1. Connect your iPad to a stable Wi-Fi network.
- Step 2. Go to Settings > General > Software Update.
- Step 3. If an update is available, tap the Update Now button.
- Step 4. Keep your iPad connected to power while the update completes.
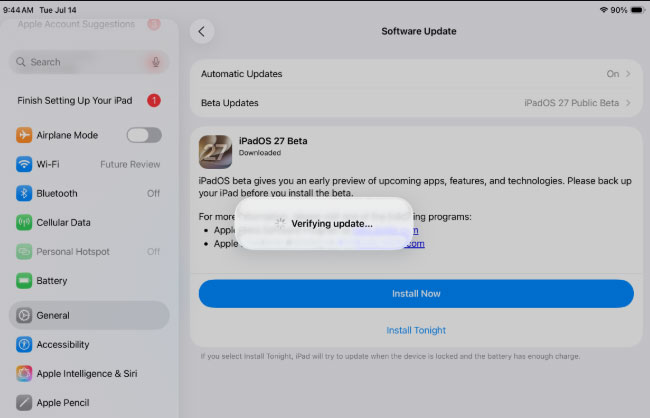
After the device restarts, check whether the iPad No Service problem has disappeared.
Fix 6: Reset Network Settings
If your cellular configuration has become corrupted or incorrectly configured, resetting the network settings gives your iPad a fresh network configuration.
This process does not erase your photos, apps, or other personal data. However, saved Wi-Fi networks and passwords, cellular settings, VPN settings, and APN settings will be reset.
- Step 1. Open Settings > General.
- Step 2. Scroll down and tap Transfer or Reset iPad.
- Step 3. Tap Reset.
- Step 4. Select Reset Network Settings.
- Step 5. Enter your iPad passcode if prompted and confirm the reset.
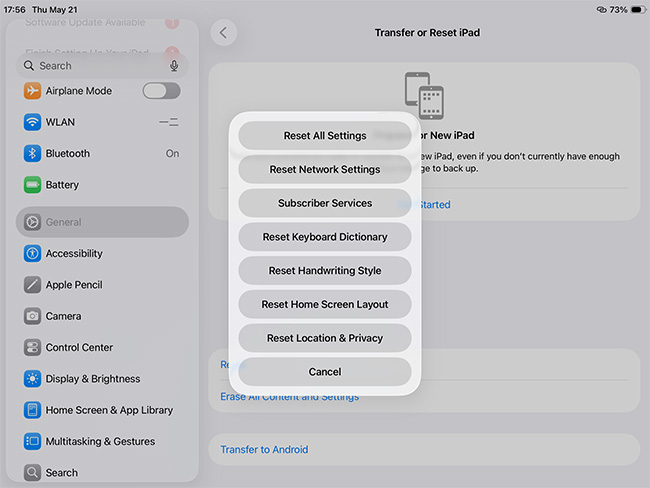
Your iPad will restart automatically. Reconnect to Wi-Fi if necessary and check whether cellular service is available again.
Fix 7: Repair iPadOS with TunesKit iOS System Recovery
If your iPad still says no service, it is most likely that it has a serious iOS glitch requiring repair. To perform the repair process, you will need third-party software, and in this particular case, we highly recommend that you use the TunesKit iOS System Recovery tool.
The software is designed to help resolve over a dozen iOS related issues, such as iPad stuck in black screen, white screen, Boot Loop, or frozen screen. If your iPad says no service, TunesKit can give an impressive answer with simple steps. What's more, this tool supports iPhone, iPad, and iPod Touch. The software easy to execute works fast to resolve the issue without losing data, so you do not have to tire about creating a data backup. So, how do you go about fixing the problem using TunesKit iOS System Recovery software? Well, check out the guide below.
Fix iPad No Service with TunesKit
Repair software-related iPad No Service issues with Standard Repair while keeping your data intact.
 600,000+ Downloads
A step-by-step guide to fix iPad no service using TunesKit iOS System Recovery.
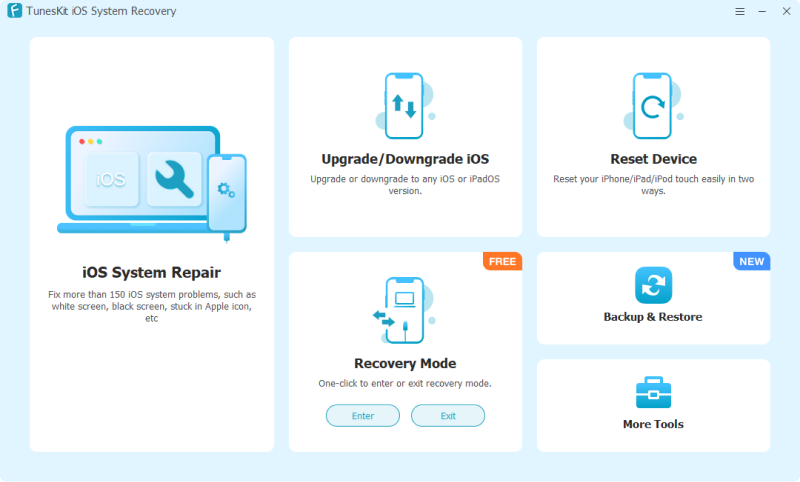
Step 1. Connect the iPad
Install and open TunesKit iOS System Recovery on a Windows PC or Mac. Connect your iPad with a USB cable and select iOS System Repair > Start.
Step 2. Choose Standard Repair
Select Standard Repair first. This mode is intended for common iOS and iPadOS system problems and keeps your device data during the repair. If Standard Repair cannot resolve a more serious system problem, Deep Repair is also available, but it erases data from the device.

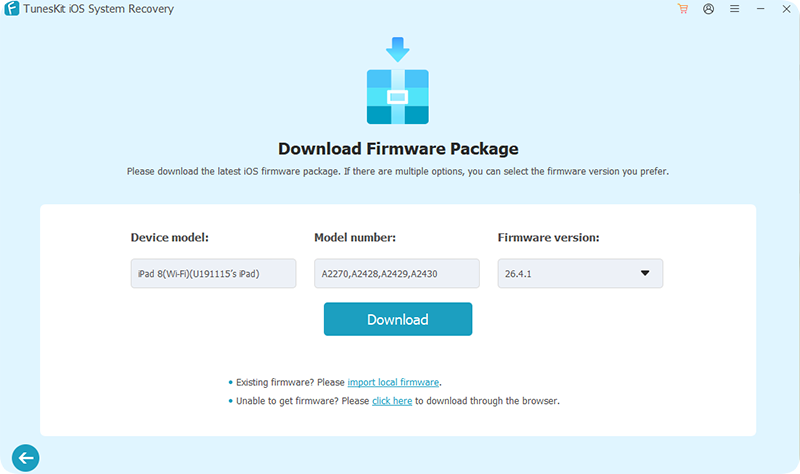
Step 3. Download the Firmware
Follow the onscreen instructions and confirm that TunesKit has identified the correct iPad model. Click the Download button to download the matching firmware package.
Step 4. Repair the iPad
After the firmware has downloaded, click Start Standard Repair and keep the iPad connected until the process finishes. When the device restarts, check whether cellular service has returned.

Fix 8: Contact Your Carrier or Apple Support
If none of the previous solutions fixes No Service on your iPad, the problem may involve your cellular account, carrier network, SIM/eSIM activation, or iPad hardware.
- Step 1. Contact your cellular carrier and ask them to verify that your account and cellular data plan are active, there is no service outage in your area, your SIM or eSIM is activated, and your device is authorized to use the carrier's network.
- Step 2. If your carrier confirms that the network and account are working normally, contact Apple Support or an Apple Authorized Service Provider.
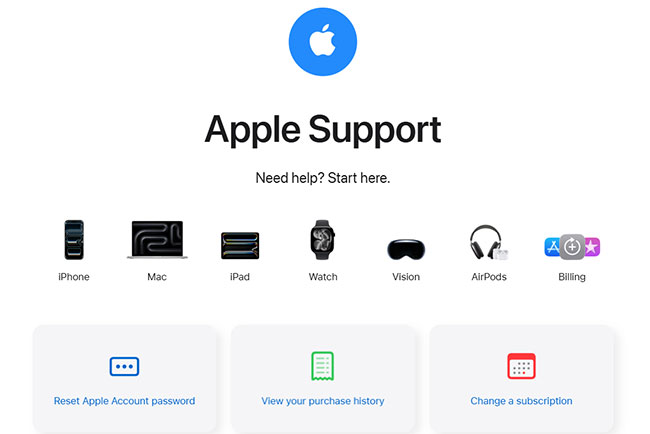
A persistent No Service message after a drop, liquid exposure, or other physical damage may indicate a problem with the iPad's antenna or cellular hardware that requires professional service.
Final Words
That's it! You can now fix the iPad no service problem. The guide above provides a detailed guide on how to fix your misery. The steps are simple, precise, and very direct. All you have to do is find which works to resolve your problem. You probably should try using the TunesKit iOS System Recovery software. TunesKit standouts out as the most effective solution and also ensure that your device's system software is up to date after repair.