iPhone/iPad Says "Swipe Up to Recover"? Fix It!
Seeing a "Swipe Up to Recover" screen on your iPhone or iPad usually means the device failed to complete an iOS update or startup process. While it looks serious, it often indicates that iOS is trying to repair itself rather than a permanent failure. In this guide, you will learn everything about the problem and how to fix it with a few steps.
What Does "Swipe Up to Recover" Mean on iPhone or iPad?
This section explains what the recovery screen actually is and why iOS shows it.
The "Swipe Up to Recover" message appears when iOS detects that the system cannot boot normally and must attempt internal recovery to restore functionality and preserve user data. It is typically triggered by:
- Interrupted iOS Update: This is the most common trigger. Updates may fail if installation is interrupted by power loss, restart, or network issues.
- Failed Restore Process: A previous update or restore via Finder/iTunes may not have completed properly, leaving the system in an unstable state.
- Low Storage Space: If your device lacks sufficient free space during an update, installation files may fail to unpack.
- Software Corruption: System file corruption caused by crashes or incomplete updates can prevent normal booting.
Will I Lose Data If I Swipe Up to Recover?
Before taking action, many users worry about losing photos, messages, and apps. This section clarifies what actually happens when you interact with the recovery screen.
Swiping up does not immediately erase your device. Instead, it triggers a recovery process that attempts to rebuild system components while preserving existing data whenever possible.
- Data is usually preserved.
- Recovery is attempted automatically.
- Failure may require restoring later.
How to Fix iPhone/iPad Stuck on Swipe Up to Recover
This section provides step-by-step solutions starting from the safest method and progressing to more advanced repair options. If your device is stuck, follow these fixes in order to avoid unnecessary data loss or system resets.
Fix 1: Swipe Up and Complete Recovery
This is the first and safest action because iOS may still successfully repair itself without further intervention.
- Step 1. Swipe up on the recovery screen.
- Step 2. Enter your device passcode when prompted.
- Step 3. Wait for "Attempting Data Recovery."

- Step 4. Keep the device connected to power.
- Step 5. Do not interrupt the process.
Let the process finish completely, which may take several minutes depending on system state.
Fix 2: Force Restart Your Device
If the recovery screen freezes or becomes unresponsive, a force restart can reset temporary system errors without deleting any data on your device.

For iPhone 8 and later:
- Press Volume Up and release.
- Press Volume Down and release.
- Hold Side button until Apple logo appears.
For iPhone 7 / 7 Plus:
- Hold Volume Down + Power button.
- Keep holding until Apple logo appears.
For iPhone 6s and earlier:
- Hold Home + Power button.
- Release when Apple logo appears.
Fix 3: Update iPhone/iPad Using Finder or iTunes
If the issue persists, reinstalling iOS using a computer can repair damaged system files without necessarily erasing data. This method is often one of the most effective solutions for system-level recovery failures.
- Step 1. Connect device to Mac or Windows PC.
- Step 2. Open Finder, iTunes, or Apple Devices app.
- Step 3. Put your device into Recovery Mode.
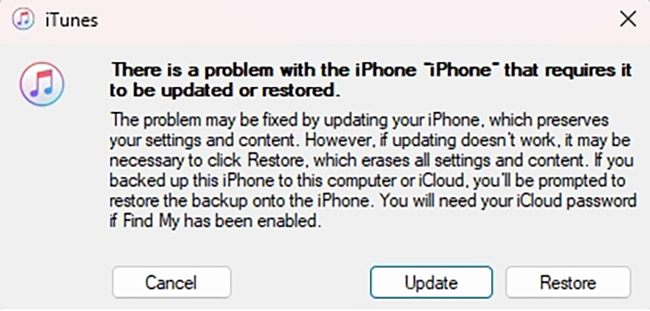
- Step 4. Click Update (not Restore) when there is a prompt.
- Step 5. Wait for download and installation.
- Step 6. Keep device connected until restart.
Fix 4: Restore Device (Last Resort Method)
If all other repair attempts fail, restoring the device may be the only solution to bring it back to normal operation.
- Step 1. Connect device to computer.
- Step 2. Enter Recovery Mode.
- Step 3. Select Restore.
- Step 4. Wait for complete reinstall.
- Step 5. Set up device or restore from backup.
When Restore Still Doesn't Fix the Issue
In rare cases, even a full restore may not successfully resolve the "Swipe Up to Recover" loop. This usually indicates deeper system-level corruption, failed firmware installation, or repeated recovery interruption. If your device still returns to the recovery screen after a restore, you may need to consider alternative repair approaches.
One example is TunesKit iPhone Unlocker, which is commonly used for iOS device access and system-related issues when standard Apple recovery methods do not succeed. While its primary functions focus on unlocking scenarios (such as screen passcode removal, Apple Account removal, and MDM bypass), it can also be considered in situations where:
- The iPhone or iPad is stuck in a persistent recovery loop.
- Finder/iTunes cannot properly recognize the device.
- Standard update or restore processes repeatedly fail.
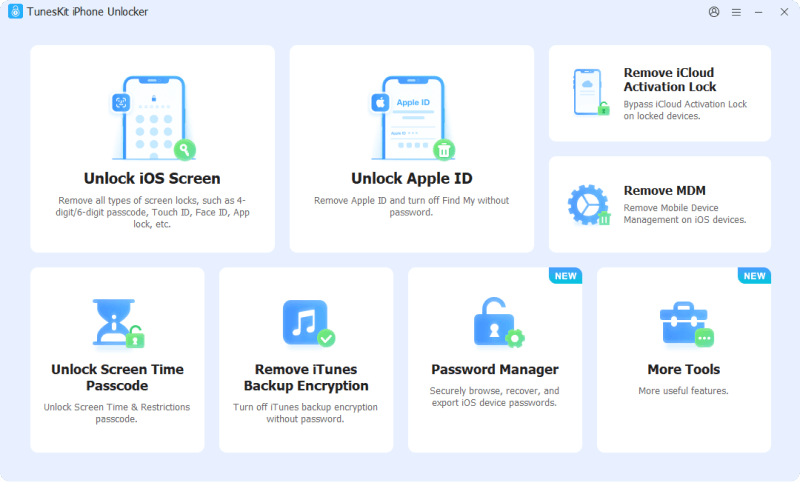
Why Choose TunesKit iPhone Unlocker?
It can factory reset iPhone/iPad/iPod touch with ease. High success rate. It allows users to remove Apple Account without password.
- Step 1. Download and install TunesKit iPhone Unlocker on a Windows or Mac computer, then launch the program and connect your iPhone or iPad using a USB cable. Select Unlock iOS Screen and then Start.
- Step 2. Confirm your device model shown on the screen. Click Download to download a firmware package compatible with your device.
- Step 3. Click the Unlock button. TunesKit will help you fix your iPhone or iPad in a few minutes.
FAQs About Swiping Up to Recover iPhone/iPad
-
Can I fix it without losing data?
Yes, using Force Restart or Update via Finder/iTunes often resolves the issue without data loss.
-
Why does recovery fail repeatedly?
This usually indicates deeper system corruption or incomplete firmware installation.
-
Is "Swipe Up to Recover" the same as Recovery Mode?
No. "Swipe Up to Recover" is a prompt that appears on the device screen, while Recovery Mode is a troubleshooting state that allows you to update or restore your iPhone or iPad using a computer. However, the two are often related.
Conclusion
The Swipe Up to Recover screen on iPhone or iPad usually appears after a failed update or interrupted system process, but it does not always mean your data is lost. In most cases, the issue can be resolved by completing the recovery process, force restarting the device, or using Finder/iTunes to update or restore iOS.
If standard methods fail, recovery mode or a full restore may be required. As a last resort, TunesKit iPhone Unlocker may be considered. Overall, the issue is typically fixable with the right steps, and your device can often return to normal without permanent damage.