


How to Lock Notes on iPhone [Quick Tips]
Wondering how to lock Notes on iPhone? If you use Apple Notes to store passwords, financial details, or other private information, keeping those notes secure is important. Apple lets you lock individual notes with Face ID, Touch ID, or a password, making it easy to protect sensitive content from unauthorized access. In this guide, you'll learn how to lock Notes on iPhone, along with troubleshooting tips if the Lock option isn't available.

How to Set Up a Password in Notes
The current system highly recommends using your iPhone's lock screen passcode to secure your notes. This approach is not only safer but also prevents the common issue of losing data because of a forgotten custom password. However, if you have specific privacy concerns, you still have the option to create a custom password that differs from your device's unlock code. The setup process is now much more intuitive.
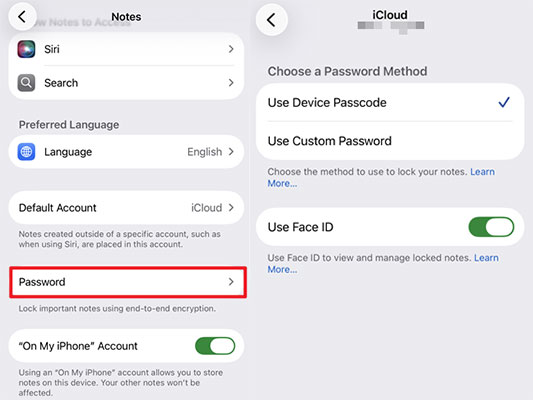
- Step 1. Open the Settings app on your iPhone, scroll down, and tap on Apps > Notes.
- Step 2. Tap on the Password option, then select the account you want to apply the lock to (such as "On My iPhone" or "iCloud").
- Step 3. Choose either "Use Device Passcode" or "Use Custom Password", and make sure to toggle on "Use Face ID" or "Use Touch ID" right below it.
How to Lock Your Notes
In older versions, locking a note required using the Share menu, but Apple has since retired that workflow. The latest iOS versions have moved the locking feature into a more intuitive options menu for quicker access.
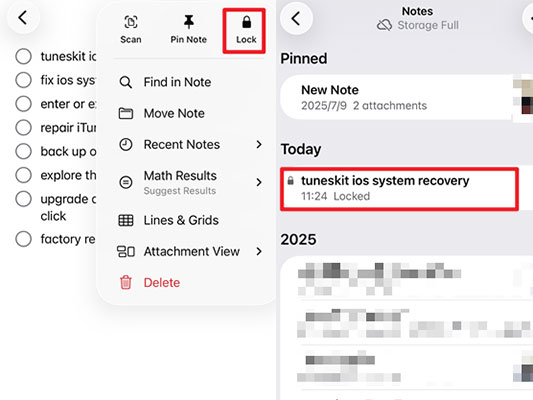
- Step 1. Open the Notes app and navigate to the specific note you want to keep private.
- Step 2. Tap the "More" icon in the upper right corner of the screen (typically represented by a circle with three dots).
- Step 3. Select the "Lock" button from the pop-up menu. After authenticating with Face ID or your passcode, a padlock icon will appear next to the title.
How to Unlock and Remove Passwords
Day-to-day unlocking is incredibly seamless, usually requiring just a quick glance at your screen for Face ID or a tap for Touch ID.
It is important to remember that simply unlocking a note only grants temporary access. Once you lock your screen or close the app, the note will secure itself again. If you want to permanently remove the encryption from that specific note, you must actively remove the lock.
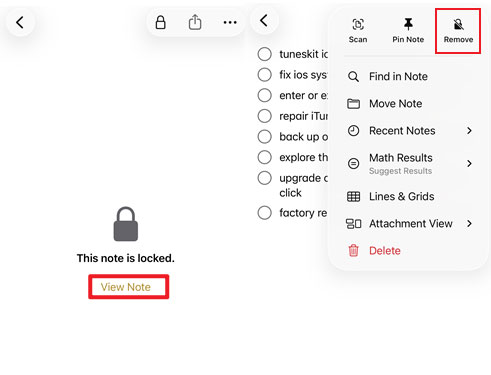
- Step 1. Tap on the note displaying the padlock icon, then tap "View Note" in the center of the screen.
- Step 2. The system will automatically trigger Face ID or ask for your password to reveal the content.
- Step 3. To permanently disable the lock for this note, tap the "More" icon (three dots) in the upper right corner again and select "Remove".
How to Change or Reset Your Password
If you followed the modern recommendation and opted for the "Device Passcode," your notes password will automatically sync whenever you change your iPhone's lock screen PIN. You only need to manage this in settings if you insist on using a "Custom Password."
The reset function acts as your last line of defense if you completely forget your custom password. Please be fully aware that resetting your password will only apply to new notes you create moving forward. For strict privacy reasons, any older notes secured with the forgotten password will remain permanently locked, and not even Apple can recover them for you.
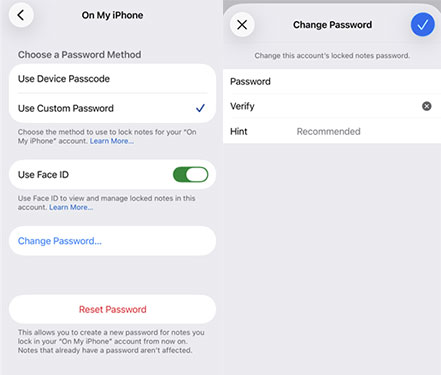
- Step 1. Go to Settings > Apps > Notes > Password, select the corresponding account, and tap either "Change Password" or "Reset Notes Password".
- Step 2. If changing it, you will need to verify the old password and enter the new one. For a reset, the system will prompt you for your Apple Account password to authorize this high-level security change.
- Step 3. Once authenticated, follow the on-screen prompts to establish the new password and a helpful hint, then tap "Done".
Bonus Tip: What to Do If You Accidentally Lose a Note
Managing passwords is one thing, but completely losing an important note can be incredibly frustrating. If you accidentally delete a note, your first stop should always be the "Recently Deleted" folder within the Notes app, where Apple automatically keeps trashed items for 30 days.
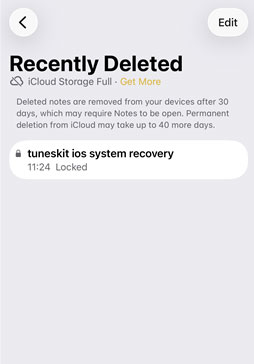
However, things get tricky if you have already emptied that folder, experienced a sudden system crash, or simply cannot find a crucial note anywhere. You might think the data is gone forever, especially if you forgot to sync with iCloud. This is where a dedicated rescue tool becomes essential. You can seamlessly retrieve permanently deleted files using TunesKit iPhone Data Recovery, directly extracting the data from your device even without a prior iTunes or iCloud backup.
Rescue Missing iPhone Notes with TunesKit
Instantly retrieve permanently deleted notes directly from your device, ensuring your vital information is securely restored even without an iCloud backup.
 600,000+ Downloads
Here is how you can quickly get your missing notes back using TunesKit iPhone Data Recovery:
- Step 1. Connect your iPhone to your computer using a USB cable and launch the TunesKit iPhone Data Recovery application.
- Step 2. Select the "iPhone/iPad Data Recovery" mode on the main interface and click "Scan" so the software can thoroughly search your device's internal storage for hidden and deleted files.
- Step 3. Once the scanning process is complete, preview the recoverable items under the "Notes" category, select the specific texts or attachments you want back, and click "Recover to PC" to save them securely to your computer.
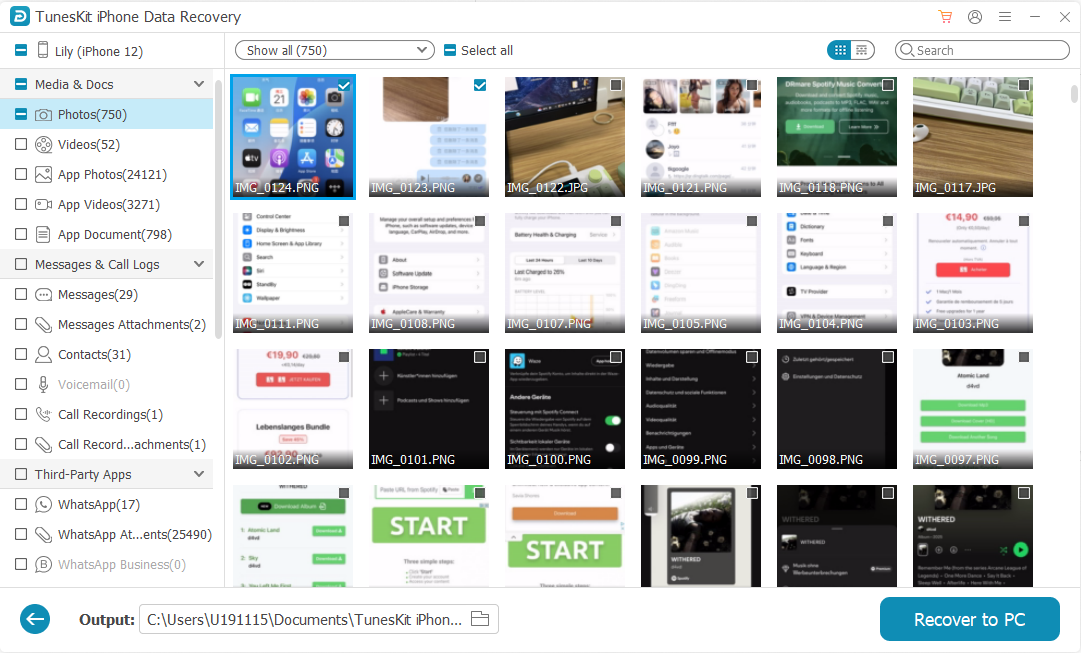
For a deeper dive into data restoration and more alternative methods, check out our comprehensive guide: How to Recover Deleted Notes from iPhone.
Conclusion
Learning how to lock Notes on iPhone with Face ID or a passcode is a simple yet essential step to safeguard your sensitive information from prying eyes. However, if your secured records ever disappear due to accidental deletion, system crashes, or iOS glitches, TunesKit iPhone Data Recovery provides the ultimate safety net. This powerful tool allows you to deeply scan your device or securely extract files from backups, letting you preview and instantly retrieve missing notes and attachments without overwriting your current phone data.