Error Connecting to Apple ID Server? Here's How to Fix It
Have you encountered the "Error Connecting to Apple ID Server" issue on your iPhone or iPad? This frustrating problem can prevent you from signing in to iCloud, downloading apps, or accessing Apple services normally. Fortunately, this issue is usually caused by network settings, Apple server issues, or incorrect device configurations — and in most cases, it can be fixed easily.
In this article, we'll explain the common causes behind the "Error Connecting to Apple ID Server" message and show you several effective ways to fix it step by step.

- Why Does "Error Connecting to Apple ID Server" Appear?
- How to Fix "There Was an Error Connecting to the Apple ID Server"?
- Method 1. Force Restart Your Device
- Method 2: Reset Your Network Settings
- Method 3: Sign Out and Back Into Your Apple Account
- Method 4: Verify Apple System Status
- Method 5: Sync Your Date & Time Settings
- Method 6: Apply A Third Party Repair Tool HOT
- Method 7: Update Your iOS Software
- Method 8: Generate a Verification Code Manually
- Summary
Why Does "Error Connecting to Apple ID Server" Appear?
When you try to sign in to the App Store, iTunes, or iCloud, you may receive the message: "Verification Failed. There was an error connecting to the Apple ID server."
This issue can occur for several reasons, ranging from network problems to incorrect device settings. Below are the most common causes:
- Poor or unstable internet connection
- Apple servers are temporarily down
- Incorrect Apple ID or password
- Wrong date and time settings on your iPhone or iPad
- iOS system bugs or software glitches
- VPN or security settings are interfering with the connection
How to Fix "There Was an Error Connecting to the Apple ID Server"?
If your iPhone or iPad cannot connect to the Apple ID server, don't worry. In most cases, the issue can be resolved with a few simple troubleshooting methods. Below are several effective solutions you can try to fix the problem step by step.
Method 1: Force Restart Your Device
Sometimes, background processes, network modules, or system caches may stop working properly, causing your device to fail when connecting to Apple servers. Performing a force restart reloads the system and re-establishes the connection settings, which may resolve the problem quickly.
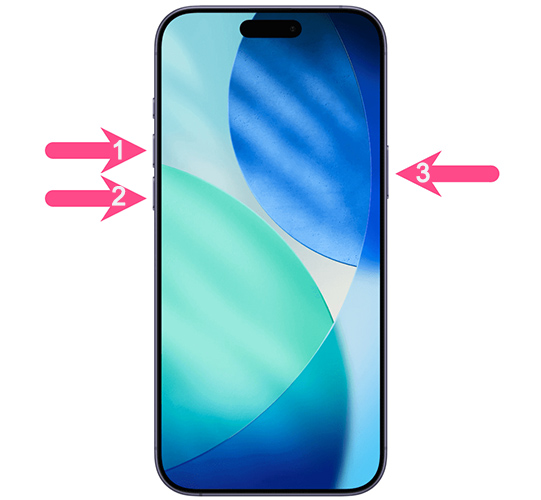
For iPhone 8, iPhone SE (2nd gen and later), and iPhone X or newer:
- Step 1. Quickly press and release the Volume Up button.
- Step 2. Quickly press and release the Volume Down button.
- Step 3. Press and hold the Side button until the Apple logo appears on your screen.
For iPads without a Home button:
- Step 1. Press and quickly release the Volume button closest to the Top button.
- Step 2. Press and quickly release the other Volume button.
- Step 3. Press and hold the Top button until you see the Apple logo.

Method 2: Reset Your Network Settings
A highly stable internet connection is absolutely crucial when your device attempts to communicate securely with Apple's servers. If your Wi-Fi or cellular data is actively dropping out, it will trigger an immediate connection failure.
- Step 1. Navigate to Settings and select General.
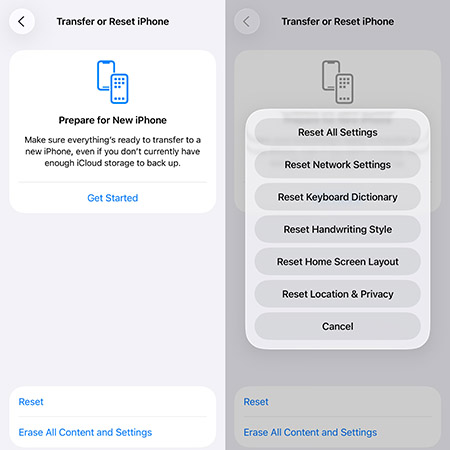
- Step 2. Scroll to the very bottom and tap Transfer or Reset iPhone (or iPad).
- Step 3. Tap Reset, choose Reset Network Settings, and enter your device passcode to confirm.
Method 3: Sign Out and Back Into Your Apple Account
In some cases, expired login sessions, syncing problems, or corrupted account data may prevent your iPhone or iPad from communicating properly with Apple servers. By signing out and signing back in, your device can establish a new connection and verify your Apple Account information again, which may resolve the error successfully.
- Step 1. Open the Settings app and tap your name at the very top of the screen.
- Step 2. Scroll all the way down to the bottom of the Apple Account menu and tap Sign Out.
- Step 3. Enter your Apple Account password when prompted to disable Find My, choose what local data you wish to keep, and tap Sign Out again.

- Step 4. Restart your device, head back to Settings, and sign back into your account.
Method 4: Verify Apple System Status
The underlying problem might not actually be with your device at all. Occasionally, Apple's proprietary servers experience unexpected outages or undergo routine maintenance, making it temporarily impossible to connect.
- Step 1. Open Safari or another web browser and visit the official Apple System Status webpage.
- Step 2. Look for the "Apple Account" and "iCloud Account & Sign In" indicators on the master list.
- Step 3. If the dot next to these services is green, the servers are functioning normally.
- Step 4. If the indicator is yellow or red, you simply need to wait until Apple resolves the ongoing server outage.

Method 5: Sync Your Date & Time Settings
Your device relies on highly precise, synchronized internal clocks to securely encrypt communications with remote servers. If your iPhone or iPad's date and time are even slightly out of sync, the server will immediately reject the connection request. This is a surprisingly common issue that frequently occurs right after installing a major software update.
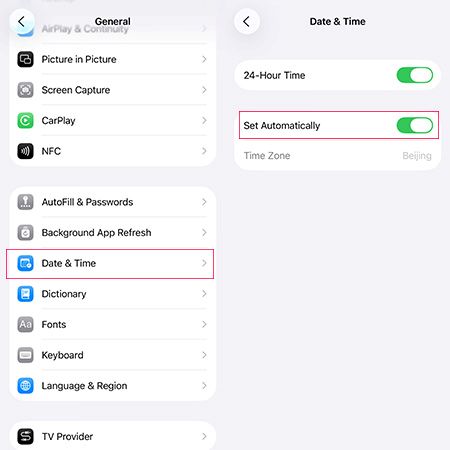
- Step 1. Open the Settings app and tap General.
- Step 2. Select Date & Time from the list of options.
- Step 3. Toggle the "Set Automatically" switch to the ON position.
Method 6: Apply A Third Party Repair Tool [Useful]
If the methods above still cannot fix the "There Was an Error Connecting to the Apple ID Server" issue, the problem may be related to deeper iOS system glitches. In this case, you can try a professional iOS repair tool like TunesKit iOS System Recovery. This software is designed to fix various iOS system problems, including Apple ID errors, unable to request SHSH error in 3uTools, update failures, and other software-related issues.
With its Standard Repair mode, you can repair your iPhone or iPad without data loss. Simply connect your device to the computer, follow the on-screen instructions, and let the program fix the system issue automatically.
Fix "Error Connecting to Apple ID Server"
Easily repair iOS system glitches causing Apple ID server connection errors — no data loss, no hassle.
Here are the steps of her using TunesKit iOS System Recovery to fix error connecting to Apple ID server.
Step 1: Connect iPhone to computer via a USB cable and open the TunesKit iOS System Recovery for Win software. Then tap on the "iOS System Repair" button. Click the Start button to move on.

Step 2: In the next window, select Standard Repair to fix iPhone error connecting to Apple ID server without data loss.

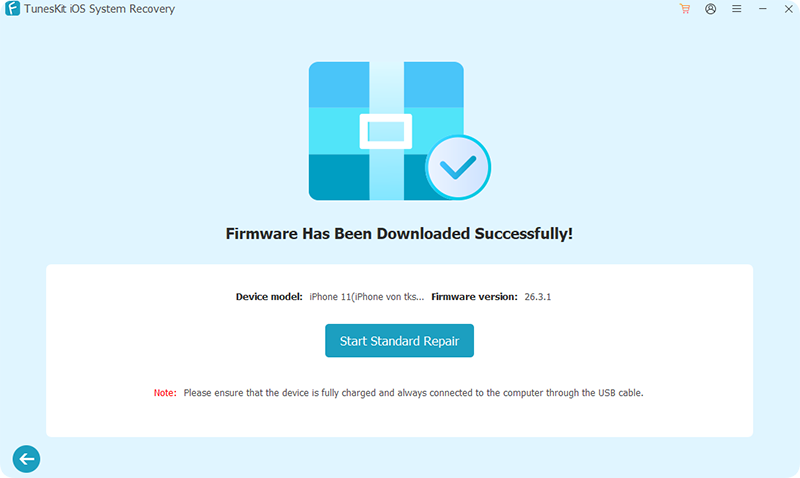
Step 3: Check iPhone's information and then click on "Download" button to download the firmware package matched with the device.
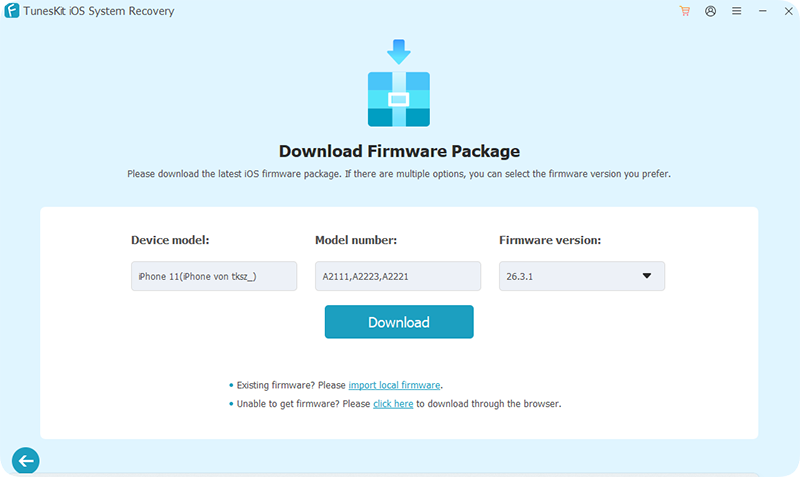
Step 4: After the firmare package is downloaded, press the "Start Standard Repair" button to quickly verify it and begin to fix the iOS. When everything is completed, the error is removed.
Method 7: Update Your iOS Software
Keeping your device updated is critical because outdated system software can harbor bugs that disrupt secure server connections. Installing the latest iOS version often patches existing authentication glitches that prevent your device from reaching Apple. If your device is running an older version, updating might be the easiest way to restore functionality.
![]() Note
Note
A fresh software update ensures all background security protocols meet Apple's current network standards.
- Step 1. Open the Settings app and tap General.
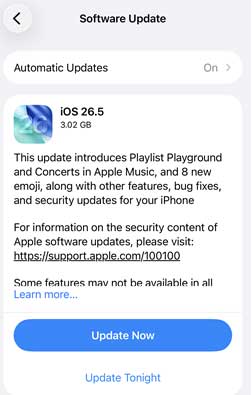
- Step 2. Select Software Update to let your device check Apple's servers for the latest version.
- Step 3. If an update is available, tap Update Now button, then follow the on-screen prompts to restart your device.
Method 8: Generate a Verification Code Manually
Sometimes the server connection error happens specifically because your device is stuck in a loop waiting for a two-factor authentication prompt. You can often bypass this bottleneck by manually generating a verification code from another trusted Apple device linked to your account, such as an iPad or a Mac. Entering this code directly can force the stalled login process to complete successfully.
![]() Note
Note
Starting with recent updates like iOS 26, Apple hides the manual code generator when your trusted device is connected to the internet. If you try looking for it while online, the option simply will not be there. To force the button to appear, you must briefly take your device offline. You can turn on the Airplane Mode temporarily.
- Step 1. On your secondary trusted Apple device, open Settings and tap your profile name at the top of the screen.
- Step 2. Navigate to Sign-In & Security.
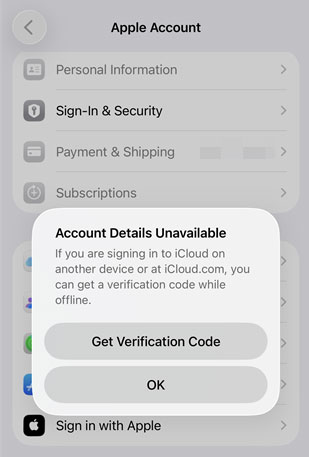
- Step 3. From a pop-up box, tap Get Verification Code to generate a six-digit number, then enter this code into the device experiencing the connection error.
Summary
The "Error Connecting to Apple ID Server" issue can stop your iPhone or iPad from accessing Apple services normally. While network or settings problems may cause this error, deeper iOS glitches can also be responsible. If basic fixes don't work, TunesKit iOS System Recovery can help repair the system safely and restore the connection without data loss.
