
Reels is a new feature that Instagram launched last year. It's a new short video sharing section on Instagram that allows users to record and edit short videos for up to 15 seconds. Instagram integrated Reels within the app rather than creating a separate app, so you can directly create and share your short Reels videos on Instagram without extra downloading.

As a short video sharing section, Reels does look like Instagram's take on TikTok, one of the most popular platforms for viral short videos. But there're still some differences. In the following parts, I'm going to illustrate how to do Reels on Instagram and an alternative way to make your Reels better with a video editor. Keep reading.
- Part 1. How to Make Reels on Instagram
- Part 2. Alternative Way on How to Make Instagram Reels on Computer
- Part 3. Bottom Line
How to Make Reels on Instagram
In this part, I'm going to show you how to make Reels on Instagram. Since it's a newly released feature and it seems that Instagram hasn't made it available for the whole world yet. So please make sure that you've installed the latest version of Instagram to be able to use this feature.

Here's how to make a Reel on Instagram:
1. Download the latest version of the Instagram app on iOS or Android, and open the app.
2. Swipe right to open the Instagram camera, or tap the camera icon in the top left corner.
3. At the bottom of the screen, tap Reels.
4. Before you shoot your video, you can search for a song from the Instagram music library to accompany your reel. You can also use your own original audio by simply recording a reel with it.
5. Tap the record button to film your Reel (the clip must last between 3 and 15 seconds). You can select one of the effects in Instagram's effects gallery, and record multiple clips with different effects.
6. You can choose to speed up or slow down part of the video or audio you selected. This feature helps you make a slow motion video or make your video match the beat of the song.
7. Tap the right arrow to preview your video. If you're happy with the result, tap the right arrow again.
8. Share ShareAlternative Way on How to Make Instagram Reels on Computer
Instagram Reels provides many editing features for users to make their short videos look fancier, but it's still tedious if you want to do more precise editing. For example, you can not move the video frame-by-frame, so you'll have to move the video many times before it perfectly matches the beat of the song. But actually you can easily make it on your computer with TunesKit AceMovi.
TunesKit AceMovi is a video editor dedicated to making video editing easier than ever. You can edit Instagram Reels with any type of media such as video, audio, image and even GIF pictures. This tool also provides music and lots of elements to make your Reels better than what you've done on Instagram.
TunesKit AceMovi Video Editor is a versatile video editor that provides multiple effects and transitions. It comes with a screen recorder that can record images as well as the sound coming out of your computer. As a well-established video editor, AceMovi is mounted with features like split screen, filters, animations, texts, and music library. The user-friendly interface comes with all the effects and tools you need to embellish your video.

TunesKit AceMovi Video Editor
Security Verified. 5,481,347 people have downloaded it.
- Basic and advanced features that make your video better
- Multiple filters, transitions, text, sound effects, music
- User-friendly interface
- Import as many photos or footage as you want
- Make Instagram Reels in just a few steps
Next up, I'm going to show you how to make an Instagram Reel in TunesKit AceMovi. Before you edit your video, make sure that you have already installed TunesKit AceMovi on your computer, this software currently supports Windows and Mac systems.
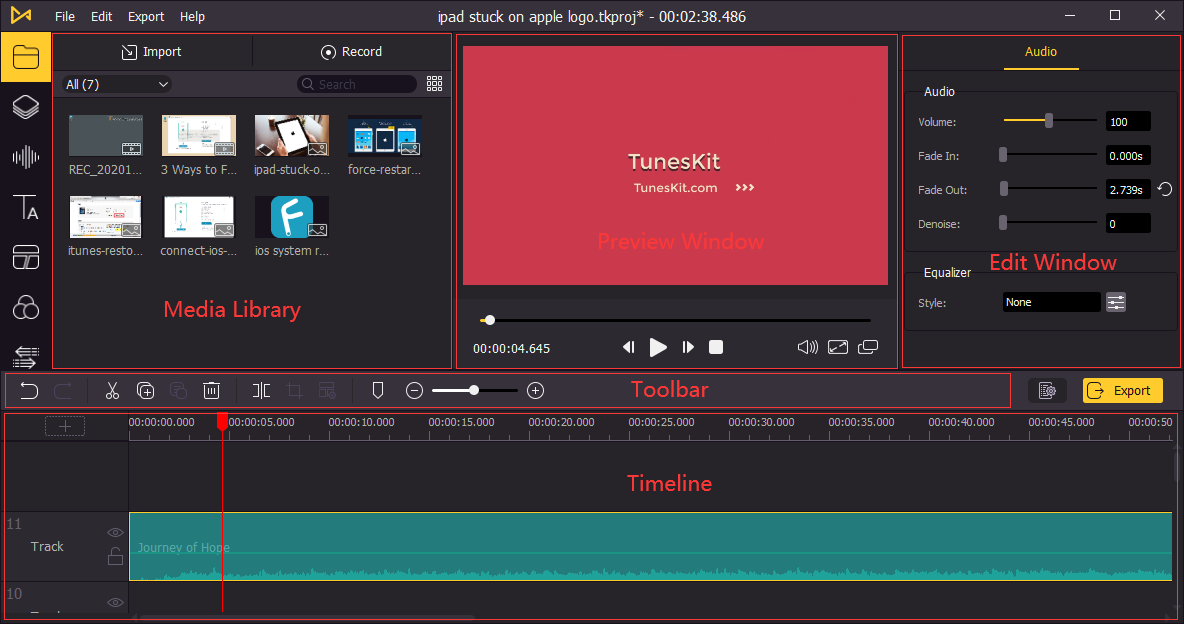
Add Media Files to TunesKit AceMovi
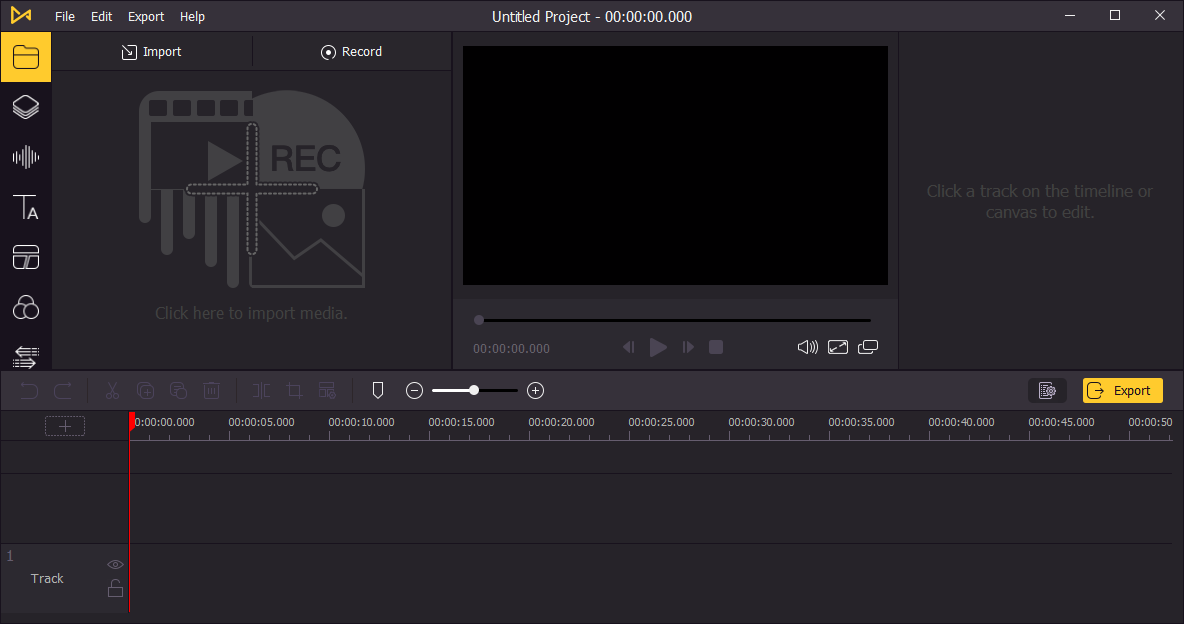
Open TunesKit AceMovi on your computer, then import your photos, video clips or other media files to the media box. You can click on the import button to upload or directly drag and drop the media files into the box.
Add Media to the Timeline
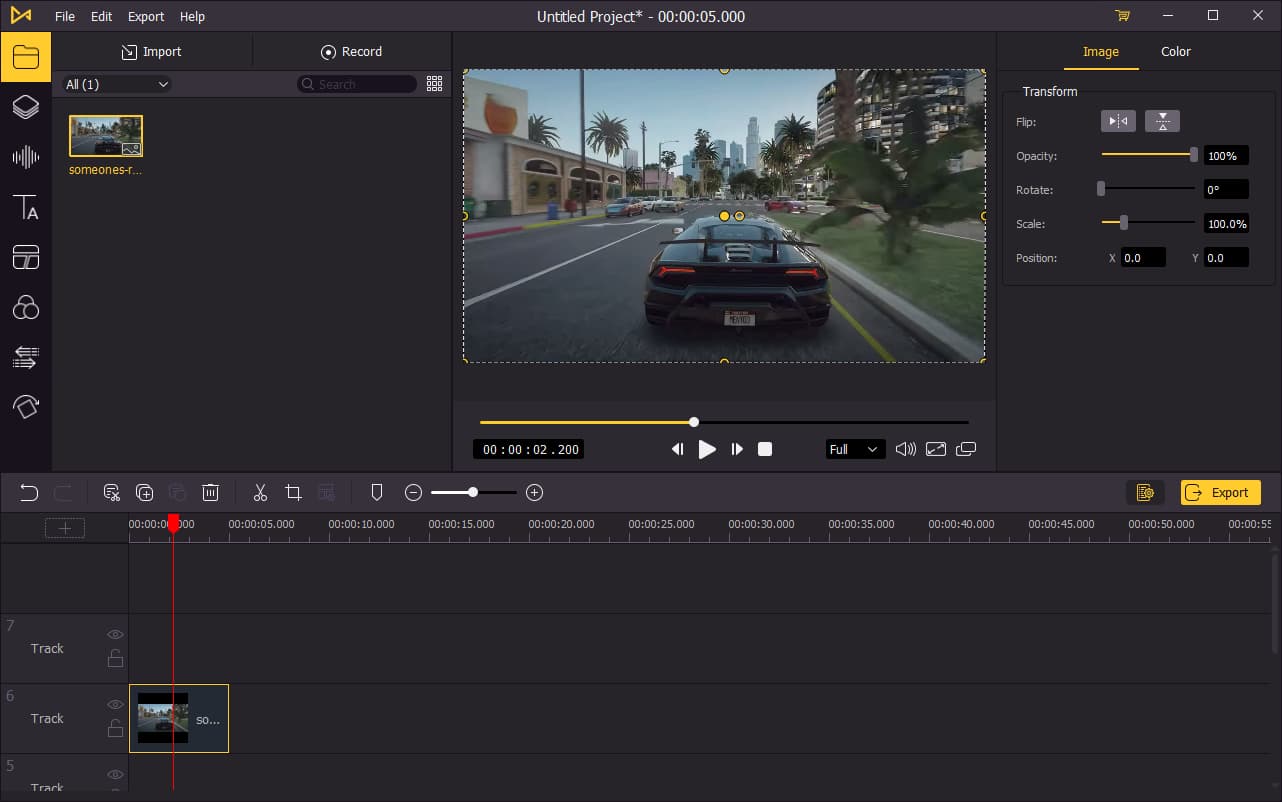
To add your media to the timeline, you can directly drag and drop them one by one. Or you can press Ctrl+A to select all the media files and drag them to the timeline. To adjust the order of the photos, directly drag the media you want to change and drop it to the place you want. This won't cover the original media so you don't have to add the file from media box again.
Edit Your Video
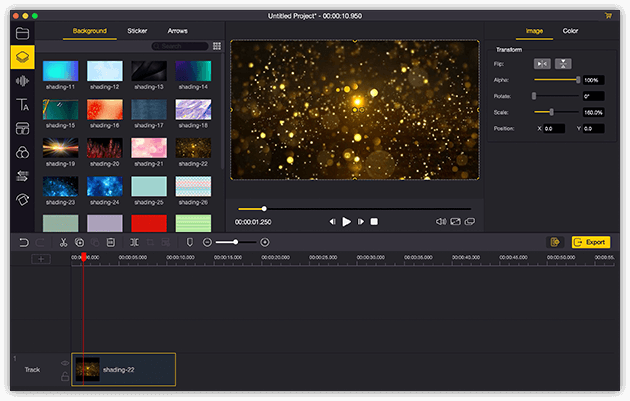
After adding media to the timeline, you can now edit your video in AceMovi. On the left bar, you can add elements, sound effects, background music, text (caption), filters, transitions and animations to your video. On the upper right panel, you can edit the effects or music you've added to the timeline.
Videos on Instagram Reels are limited to 15 seconds, so you'll have to cut the unnecessary part of the video with the split tool in the middle toolbar.
Export Video
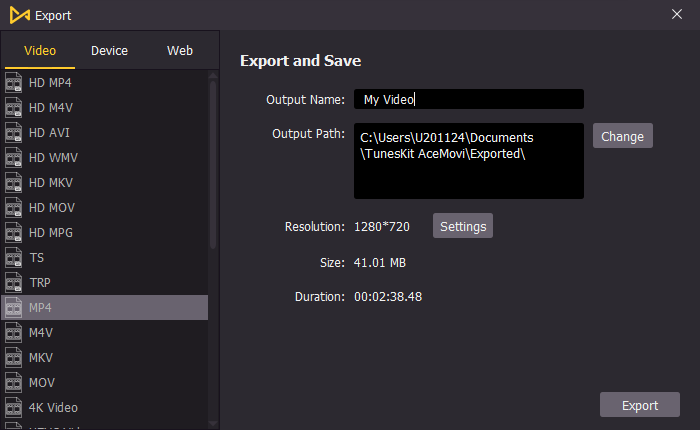
Once done editing your video, click the Export button on the middle left and export your video. Click the Settings, you'll be able to choose the output parameters. And by clicking the Change button, you can change the output location.
Share Your Video on Instagram Reels
After exporting your video, you can transfer it to your phone and upload it on Instagram Reels. You can share your video directly without further editing. If you don't know how to post Instagram Reels yet, you can go to the first part.
Bottom Line
Making an Instagram Reel is not a tough task, you can easily make it on Instagram and with TunesKit AceMovi. Compared to making a Reel on Instagram, you'll get more flexibility and cool features editing your Reels in TunesKit AceMovi. This tool is also stable to use on your computer, you can export the video without getting stuck.