
Reaction videos are one of the most popular categories on YouTube. You can react to a live performance, a sports game, a film or any other subject. Content creators can share ideas and thoughts on the objects they’re reacting to and convey them to millions of people on YouTube. Also, sharing reaction videos is a great way to promote your channel, which can help it grow faster than you can ever think of.
Making a reaction video is not a difficult task once you decide what you’re going to react to. And there’ll be some editing after you making your reaction videos. So in the following parts, we’re going to talk about how to make reaction videos and how to upload them on YouTube without getting copyright strikes.
- Part 1. How to Make A Reaction Video (Simple Steps)
- Part 2. Bonus Tips: How to Make Reaction Videos without Copyright Strike for YouTube
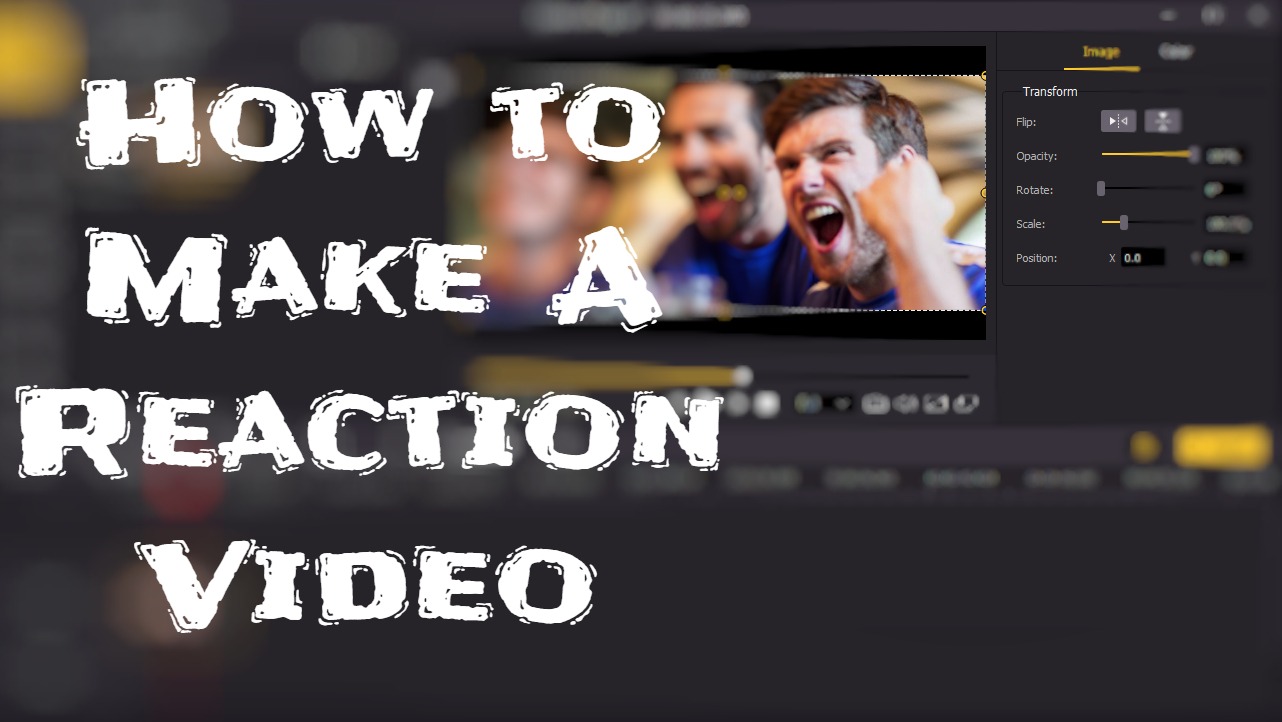
How to Make A Reaction Video (Simple Steps)
Making a reaction video is different from what you used to do completely relying on your computer or phone. You’ll need to film yourself in a room with a camera, and an external microphone if you do care about sound quality.
Before Making A Reaction Video
Here are some devices you need to prepare before you start making your reaction videos. These are the basic setup needed to make a reaction video, you can add some more and there's no limit to making your content more creative.
1. Cameras
For higher quality, you may need to use standalone video cameras and place them at different angles. Of course, you can use your phone camera, or a built-in camera on your computer screen. That depends on your budget and what quality you’re pursuing.
2. A Microphone
To make a reaction video, you may need a microphone to record what you say while you’re reacting. Or you can make your video solely rely on your facial expressions. But overall, a video with your voice will have a better viewer retention rate. If you have a tight budget, your phone mic or a handy recorder can also be qualified for the job.
3. A Quiet Room with Good Lighting Setup
You will need a quiet room and preferably a decent lighting setup to make your face visible. You don’t need a professional lighting suit, brighter bulbs or handy LED lights are all you need to make your room look better.
Set Up Devices and Start Filming
Before start filming yourself into the video, you’ll need to set up your camera and microphone. Here’re some tips to help you get started.
Set Up Camera: The basic principle is to place the camera where your face is totally visible, and you should be in the center of the frame. But it’s not a good idea to place the camera right in the face, create a bit of distance so that you can still be in the frame while you sit back or lean left and right.
Test Your Microphone: You’re supposed to place your mic at different placements to test where it sounds best while you’re recording your voice. Speak as loudly and as softly as you can, so that you can test how well the mic picks up your voice. Once your voice is clear in the recording, you’re good to get started.
Edit Your Reaction Videos
Once you finish the filming and recording sections, you’ll need to put the video of yourself and the video you’re reacting to together. In this case, you’ll need a video editor that can merge the videos and audios, preferably can do some editing to make your final work look and sound good.
With TunesKit AceMovi, you can easily put your reaction video and the video you’re reacting to into the same sequence. Then you can edit your reaction video like where you want it to be placed and what size it should be in the frame. Also you can import the audio you’ve prerecorded and add it to your video.
TunesKit AceMovi Video Editor is a one-stop video editor that provides multiple effects and transitions. It comes with a screen recorder which can record images as well as the sound coming out of your computer. As a well-established video editor, AceMovi is mounted with features like split screen, filters, animations, texts, picture-in-picture and music library. The self-explanatory user interface comes with all the effects and tools you need to embellish your video. You can easily learn how to use it even if you're a beginner. You can edit your reaction video by making it a picture-in-picture easily in AceMovi.

TunesKit AceMovi Video Editor
Security Verified. 5,481,347 people have downloaded it.
- Basic and advanced features that make your video better
- Multiple filters, transitions, text, sound effects, music
- User-friendly interface
- A variety of output options to choose from format, device, social platform
- Edit reaction video in just a few steps
Follow up, I'm going to show you how to edit your reaction video. But before that, make sure that you have already installed TunesKit AceMovi on your computer, this software currently supports Windows and Mac systems.
Step 1Add Video Files to TuneKit AceMovi
Open TunesKit AceMovi on your computer, then import your video footage to the media box. Or you can directly drag your video to the timeline.
Step 2Change Scale of the Video
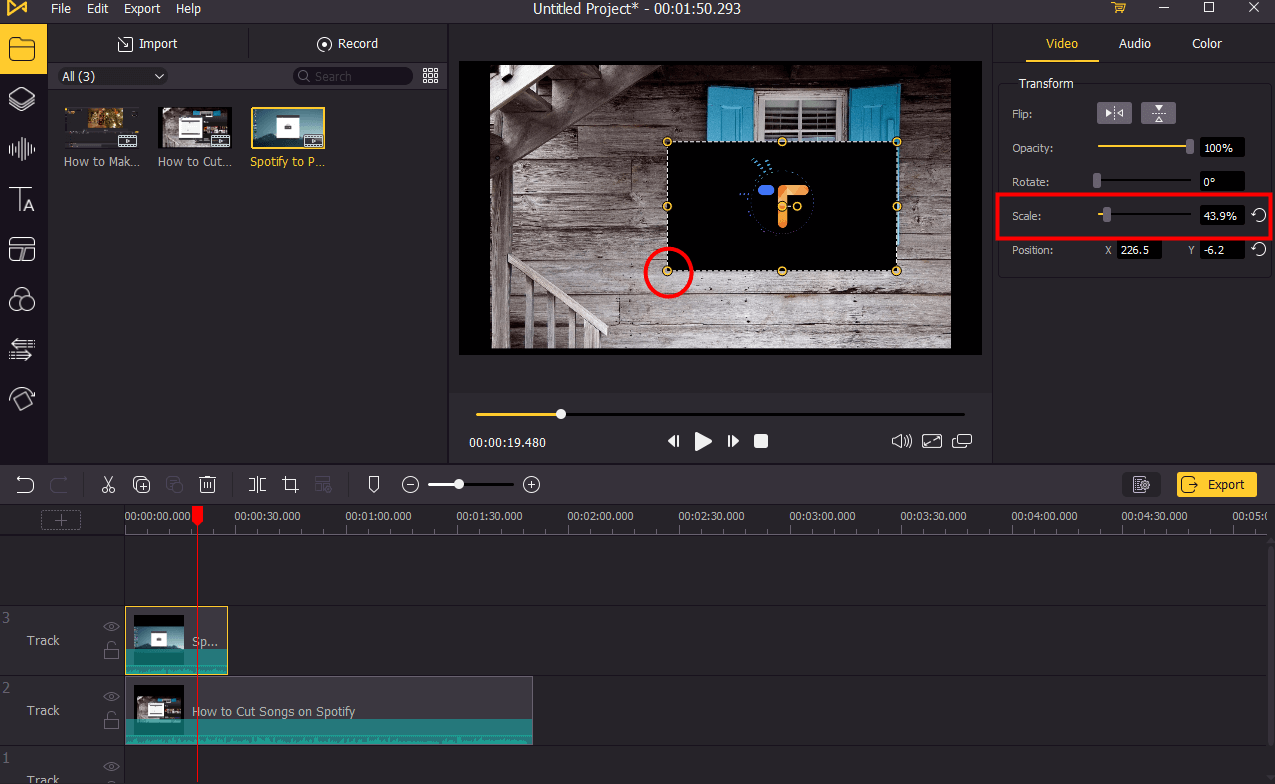
Add your reaction video and the video you're reacting to on the timeline, note that the reaction video should be on above, then scale down your reaction video. There're two ways to change the scale of your videos:
1. Click on the video to select it, then move your mouse to the corner of the video. Click on it and hold your mouse, then drag it to resize your video.
2. Click the video you want to resize on the timeline, then go to the upper right panel. Under Video, drag the marker of Scale to the left to scale down the video or you can type in the percentage and press Enter on your keyboard to change the scale of the video.
Step 3Adjust the Position of Your Video
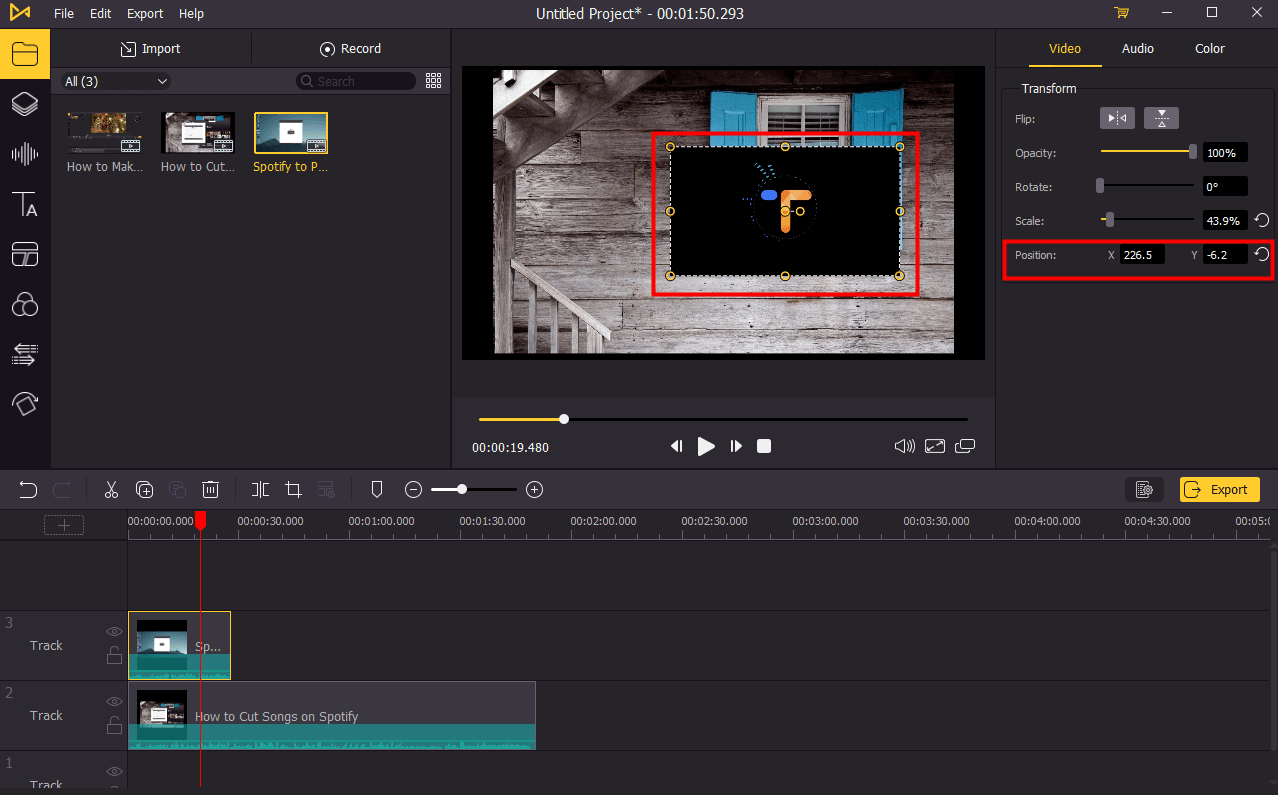
Click on the video on the preview screen and hold it, then you can drag it to change the position. If you want to set the video position precisely, you can go to the upper right panel. Under Video, you can change the position by changing the X and Y parameters. X stands for horizontal position and Y stands for vertical position.
Step 4Export Video
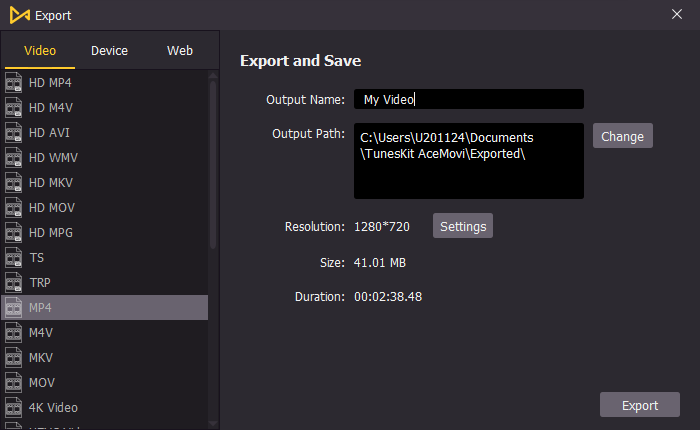
Once done editing, click the Export button on the middle left and export your video. Click the Settings, you'll be able to choose the output parameters. And by clicking the Change button, you can change the output location.
Bonus Tips: How to Make Reaction Videos without Copyright Strike for YouTube
If you upload your reaction video on YouTube, you're likely to get a copyright strike from YouTube without the permission of usage from the creator of the original video. So the most recommended way to avoid copyright issues is to contact the original creator and get the permission.
If you didn't get the permission and still want to use the video. Here're some tips:
1. Mute the original video or change the pitch or the video.
2. Use no more than 30 seconds of each clip.
3. Credit their channel and video in your video description. That might also work sometimes.
Since there's no absolute solution to avoid copyright strike from YouTube, you may need to try different methods and choose the best one for you.