Stolen Device Protection Explained & How to Turn On/Off Quickly
With the release of iOS 17.3, Apple introduced a powerful new feature: iPhone Stolen Device Protection feature. Designed to safeguard your device from unauthorized access, this security upgrade adds an extra layer of protection - especially if your iPhone falls into the wrong hands.
But what exactly does Stolen Device Protection do, and how can it help secure your personal data?
In this guide, we'll walk you through everything you need to know, including what Stolen Device Protection is, how to turn it on or turn off Stolen Device Protection with/without Face ID, and how to troubleshoot common issues if something goes wrong.
Let's dive in!
Part 1. What Does Stolen Device Protection Do?
Still wondering what is Stolen Device Protection on iPhone and whether you should update to iOS 17.3 and turn on Stolen Device Protection? This section delves into what iOS Stolen Device Protection actually does, how it works, and more FAQs about iPhone Stolen Device Protection feature.
1.1 iOS Stolen Device Protection Features Overview
Simply put, Stolen Device Protection adds multiple layers of security to your iPhone. It makes it significantly harder for someone to make critical changes to your device - even if they know your passcode.
Here's what makes it so effective:
- It requires Face ID or Touch ID instead of just a passcode for sensitive actions.
- It prevents immediate access to high-risk features like resetting the device, changing Apple ID info, or accessing saved passwords.
- It adds a time delay before making certain changes - giving you a chance to react if your iPhone is stolen.
1.2 How Does Stolen Device Protection Work?
To sum up, the feature works by detecting when someone tries to make sensitive changes and enforcing biometric authentication (Face ID or Touch ID) instead of a simple passcode.
For particularly high-risk actions, such as changing your Apple ID password or disabling Stolen Device Protection, it also introduces a one-hour Security Delay. During this time, no changes can be made, and the user must re-authenticate with biometrics after the delay.
This gives you a crucial window to mark your iPhone as lost or take steps to protect your Apple account if your phone falls into the wrong hands. For example:
🔐 Before Stolen Device Protection:
A thief could reset your iPhone by simply entering your screen passcode.
🔒 With Stolen Device Protection:
They would need Face ID or Touch ID, and in some cases, wait through a one-hour delay, making unauthorized access far more difficult.
Here's a list to common senarios that will trigger Stolen Device Protection:
- View iCloud Keychain passwords or credit cards;
- Turn off Lost Mode;
- Erase all content and settings;
- Apply for or accesse Apple Card and Apple Cash info;
- Use Apple Cash or Savings;
- Set up a new device with your iPhone.
- Change your Apple ID password;
- Sign out of your Apple account;
- Modify account security settings (trusted devices, recovery key, etc.);
- Change your iPhone passcode;
- Add or remove Face ID/Touch ID;
- Reset all settings;
- Join in Mobile Device Management or delete the MDM profile;
- Turn off Stolen Device Protection
1.3 More FAQs on iOS Stolen Device Protection
-
1. Is Stolen Device Protection Work on iPad?
No, iOS Stolen Device Protection feature is currently exclusive to iPhones. Apple developed it specifically for mobile devices that are more likely to be stolen. iPads continue to rely on standard protections like passcodes and Find My iPad.
-
2. Should You Turn On Stolen Device Protection?
It is highly recommended to turn on Stolen Device Protection. It adds a layer of security that prevents unauthorized users from accessing your device. If your device is ever lost or stolen, this feature helps to safeguard your personal information.
But if your Face ID is broken or you want to sell your iPhone, you'd better turn off Stolen Device Protection. -
3. Does Stolen Device Protection Drain Battery?
No, Stolen Device Protection does not significantly affect your device's battery life. It runs in the background and only activates when necessary, such as during a device reset or when suspicious activity is detected.
-
4. What Happens If I Turn Off Stolen Device Protection?
If you disable Stolen Device Protection, someone with your passcode could erase your iPhone and set it up as new without needing your Apple ID credentials - making your device far more vulnerable to misuse or theft. Besides, it's convenient for you to use multiple Apple IDs on iPhone.
Part 2. How to Turn On Stolen Device Protection on iPhone
It's quick and easy to turn on Stolen Device Protection on iPhone, as long as you meet a few basic requirements as listed below. In this part, we will walk you through everything you need to check and configure to activate this important security feature.
▪ iPhone running iOS 17.3 or later (iPhone XS or newer)
▪ Two-factor authentication enabled for your Apple ID
▪ Find My iPhone enabled (note: you can't disable Find My iPhone while Stolen Device Protection is active)
▪ Screen lock passcode set up with Face ID or Touch ID enabled
▪ Significant Locations turned on in Location Services
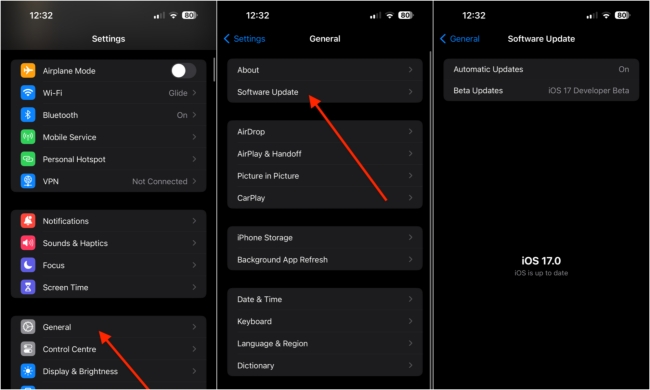
Step 1Check Your iOS Version
First, ensure your iPhone runs iOS 17.3 or later. This feature is unavailable on earlier versions. Go to Settings > General > Software Update to check and install.
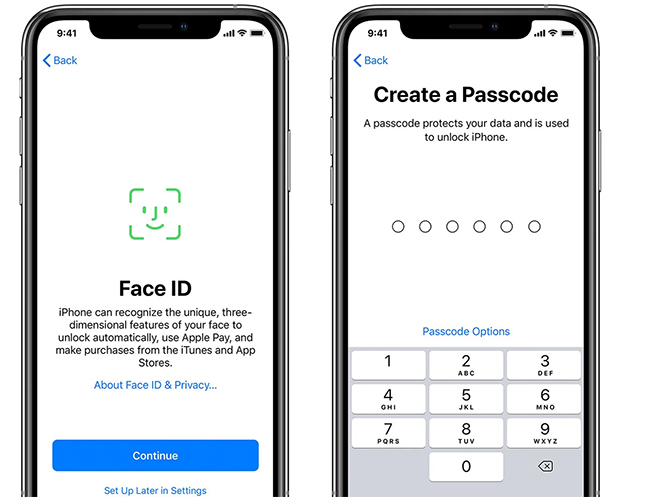
Step 2Set Up Face ID or Touch ID and Passcode
Ensure you've set up the screen lock passcode and Face ID.
If not, go to Settings > Face ID & Passcode > Set up Face ID. Then, iPhone will prompt you to set a passcode if you don't have one, just follow the on-screen instructions to set up the screen lock passcode and Face ID.
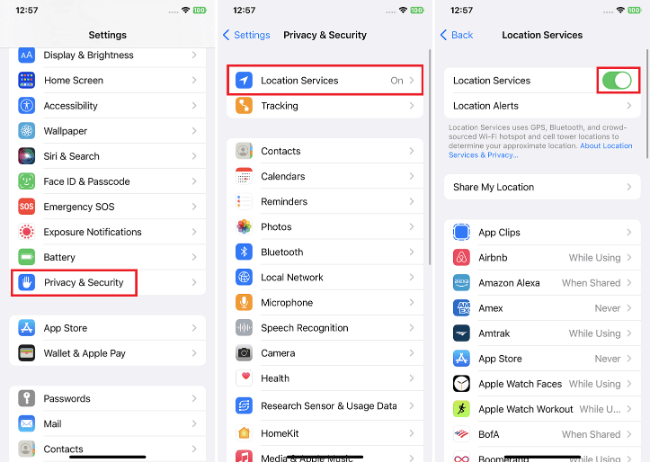
Step 3Turn On Significant Locations
Ensure you've turned on Significant Location.
If not, go to Settings > Privacy & Security > Location Services > System Services > Significant Location. Then, you'll need to verify your identity via Face ID or Touch ID.
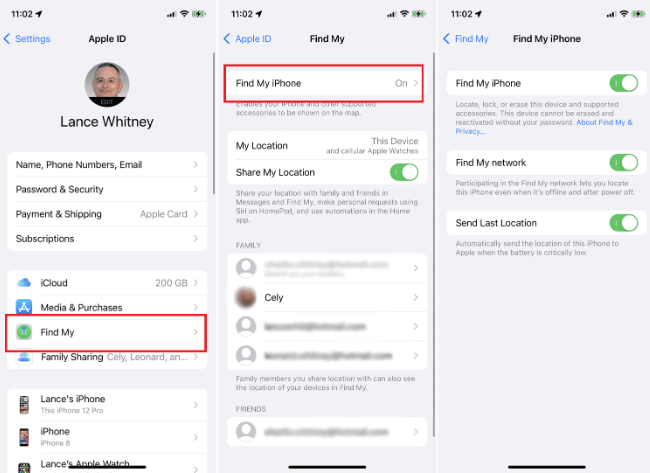
Step 4Enable Find My iPhone
Ensure you've turned on Find My iPhone.
If not, please go to Settings > [Your Profile] > Find My > Find My iPhone.
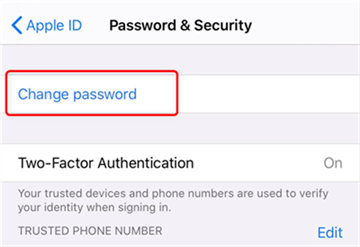
Step 5Activate Apple ID Two-Factor Authentication
Ensure you've turned on the Apple Account Two Factor Authentication.
If not, go to Settings > [Your Profile] > Sign in & Security > Turn On Two-Factor Authentication.
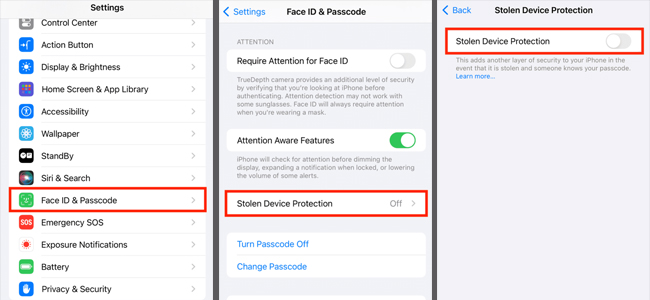
Step 6Turn On Stolen Device Protection
Check if there's a Stolen Device Protection option.
After all the above features are set, scroll down to the bottom of Face ID & Passcode settings. Tap "Stolen Device Protection" to turn it on.
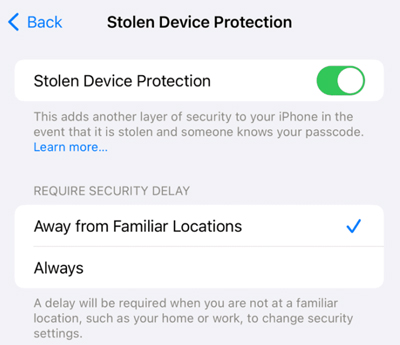
✨ Starting with iOS 17.4, Apple added a location-based control option that lets you decide where the Security Delay will be triggered:
- Away from Familiar Locations: Security Delay will activate only when you're not at trusted places like home or work.
- Always: Security Delay activates for sensitive actions no matter where you are - offering maximum security.
Now, you've successfully activated the Stolen Device Protection on iPhone!
Part 3. How to Turn Off Stolen Device Protection Quickly
While Stolen Device Protection is crucial for keeping your iPhone secure, there are times when you may need to turn it off - temporarily or permanently. Common scenarios include:
- Your Face ID or Touch ID isn't working;
- You want to sell or gift your iPhone;
- You bought a second hand iPhone with Stolen Device Protection enabled;
- You're experiencing bugs or unnecessary Security Delay prompts.
No matter the reason, here's how to disable Stolen Device Protection - with or without Face ID.
Option 1. Turn Off Stolen Device Protection on iPhone Settings [With Face ID]
✅ Requirements: Your Face ID or Touch ID is working properly.
⏱ Required Time: About 1 hour and a few minutes.
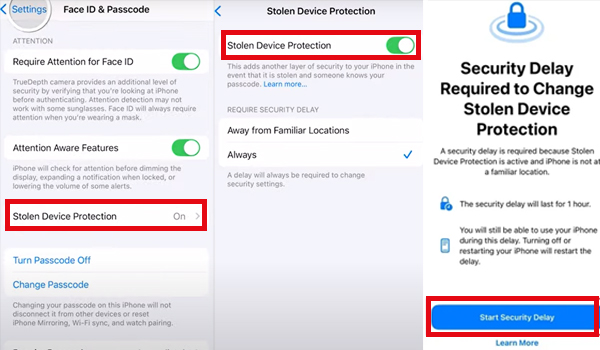
Step 1. Go to Settings > Face ID & Passcode, scroll down and tap Stolen Device Protection.
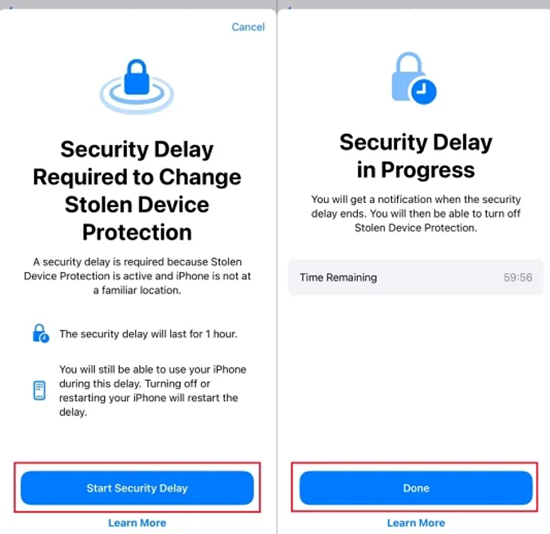
Step 2. Tap the switch to turn it off. Your iPhone will show a Security Delay warning message.
Step 3. Tap Start Security Delay > Done. Your iPhone will now start a one-hour countdown.
Step 4. After the delay, go back to Settings > Face ID & Passcode > Stolen Device Protection. Verify with Face ID again and toggle the feature off.
Option 2. Disable Stolen Device Protection via Professional Tool [Without Face ID]
✅ Requirements: A USB cable, a Windows/Mac computer, and your iPhone.
⏱ Required Time: About 10 minutes.
If your Face ID is broken, or you're unable to verify your identity due to several reasons, you won't be able to turn off Stolen Device Protection through standard settings.
Thankfully, this is where TunesKit iPhone Unlocker comes in - an all-in-one tool that allows you to bypass Stolen Device Protection without Face ID, remove Screen Time restrictions, delete MDM profiles without passcode, and more issues related to iPhone passcode.
Now, let's see how to turn off Stolen Device Protection without Face ID or Touch ID via TunesKit iPhone Unlocker. You can start with free downloading this iPhone unlock software with the Try It Free button below.
Key Features of TunesKit iPhone Unlocker
Remove Stolen Device Protection, unlock disabled iPhone, remove Apple ID, bypass MDM and screen time limits, turn off iTunes Backup Encryption, and bypass iCloud Activation Lock.
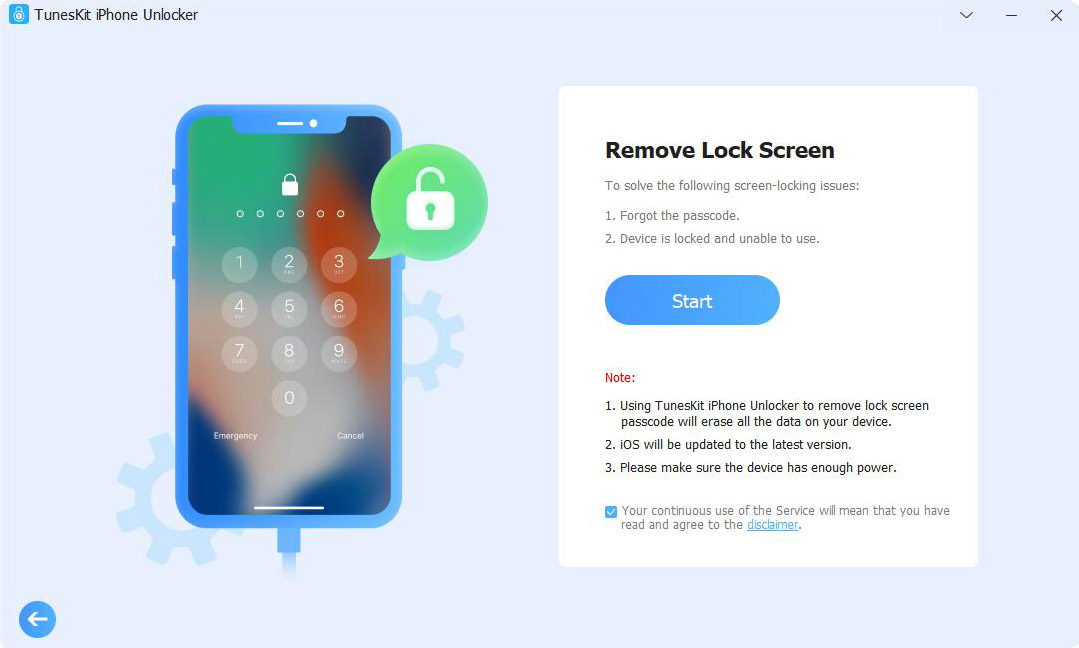
Step 1Connect Your iPhone to Computer
Launch TunesKit iPhone Unlocker and select Unlock iOS Screen mode. Then, use a USB or Lightning cable to connect your iPhone to your computer.
⚠️ Note: This process will erase all data from your device. Make sure to back up your iPhone to iTunes or iCloud before proceeding.
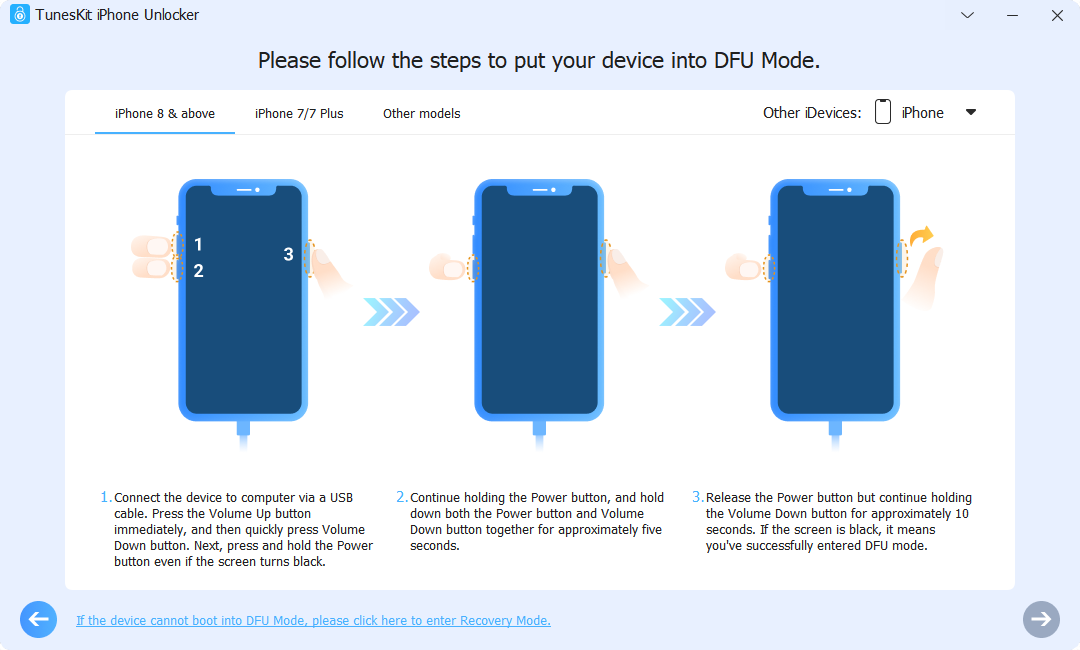
Step 2Enter DFU or Recovery Mode on iPhone
Follow the on-screen instructions to put your iPhone into DFU or Recovery Mode. Once done, click Next to move on.
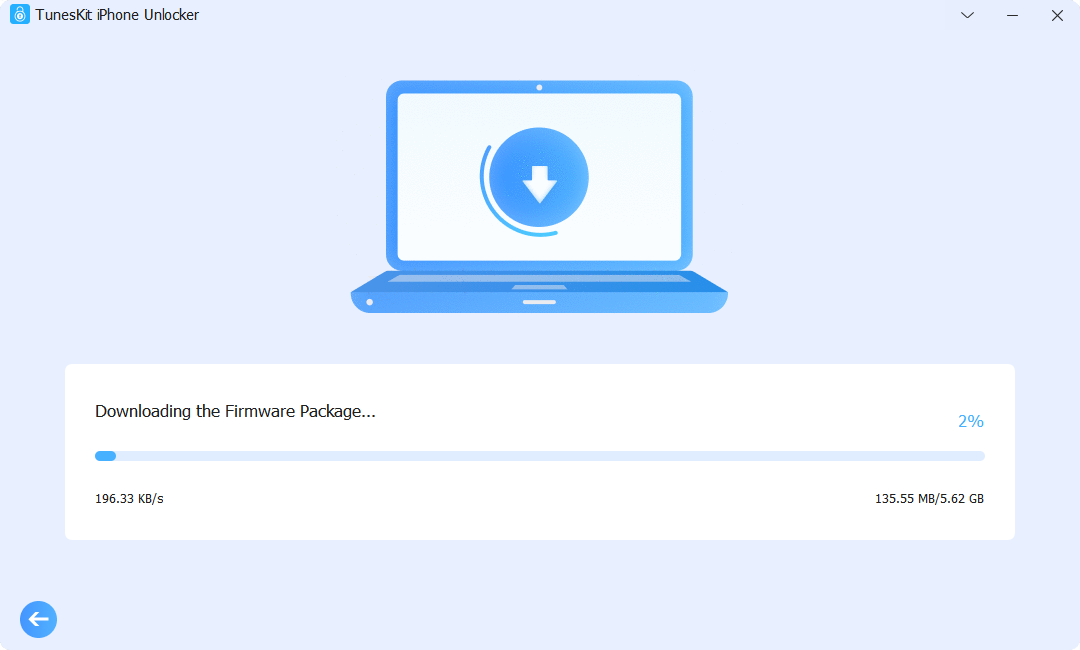
Step 3Download Correct iPhone Firmware Package to Remove Stolen Device Protection
TunesKit will automatically detect your iPhone model and iOS version. Verify the information, then click Download to get the necessary firmware package without iOS Stolen Device Protection inserted.
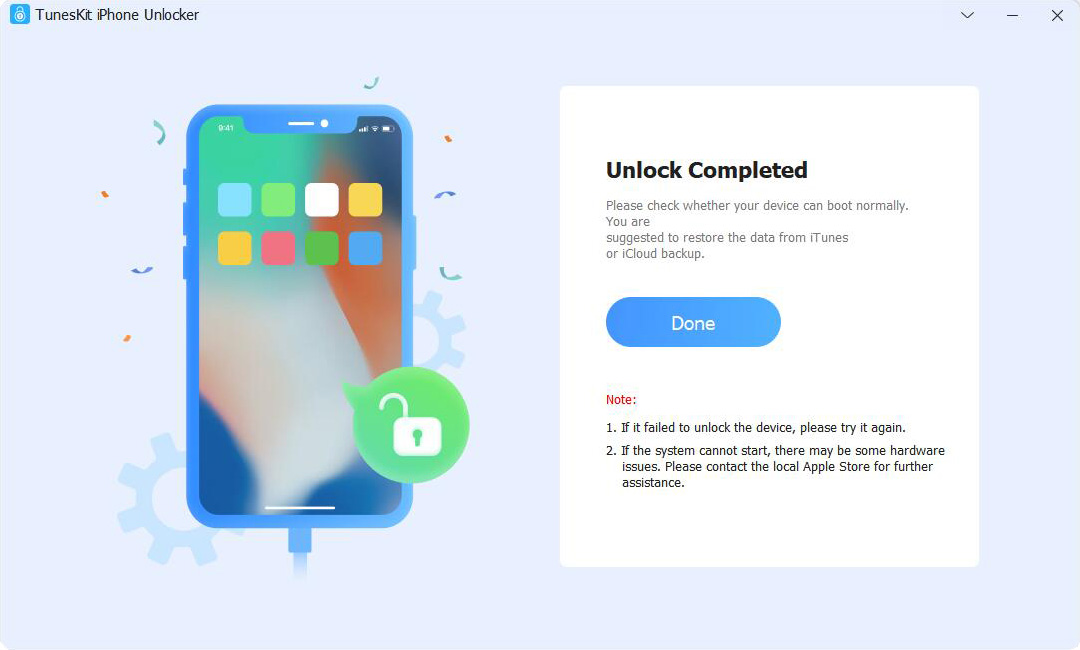
Step 4Remove Stolen Device Protection within Minutes
Once the firmware is downloaded, click Unlock to turn off Stolen Device Protection without Face ID or Touch ID. In just a few minutes, Stolen Device Protection will be removed, and you'll have full access to your device again.
During the iPhone setup process, you'll still need the original Apple ID and password to proceed. If you don't have them, use Remove iCloud Activation Lock mode in TunesKit to resolve the "iPhone locked to owner" issue.
Besides, please choose Don't transfer Apps & Data and Set Up Later in Settings option. This prevents Stolen Device Protection from being restored via iCloud or another iPhone backup directly.
Part 4. Troubleshooting iOS Stolen Device Protection Related Issues
While Stolen Device Protection is a valuable security enhancement in iOS 17.3 and later, you might run into some hiccups when trying to enable or disable Stolen Device Protection. Here are a few common problems and how to resolve them quickly.
Issue 1. Stolen Device Protection Not Showing Up
If Stolen Device Protection doesn't appear in your settings, it's likely because one or more required features aren't enabled, or your iPhone is running systems earlier than iOS 17.3.
✅ Solution: Make sure you've enabled all features required, which we've listed on Part 2.
Issue 2. Can't Turn Off Stolen Device Protection
If you're unable to turn off Stolen Device Protection, it may be due to a verification issue with your Face ID/Touch ID or a device restriction related to security delays.
✅ Solution:
a. Confirm your Face ID or Touch ID is working correctly. If your Face ID or Touch ID is failing, consider using a professional tool like TunesKit iPhone Unlocker to bypass the restriction without needing biometric authentication
b. Turn off Stolen Device Protection on your familiar locations. If you've chosen the "Away from Familiar Locations" option on Stolen Device Settings, you can try to turn it off on your home or other familiar locations to avoid security delay loop or other issue.
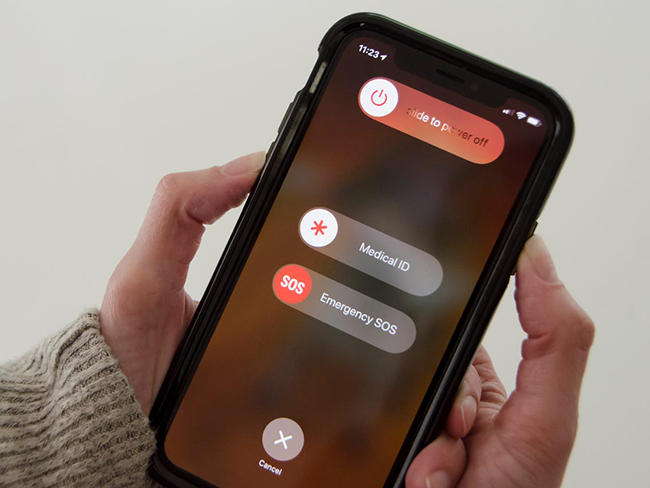
c. Restart your iPhone to refresh related settings. If the "can't turn off Stolen Device Protection" problem persists, you may need to restart your iPhone to clear some temporary glitches.
Issue 3. iPhone Stolen Device Protection Doesn't Recognize Familiar Location
If your iPhone doesn't recognize your familiar locations (like home or work), the system may default to triggering delays, which can be frustrating. Here's what you can do:
✅ Solution:
a. Go to Settings > Privacy & Security > Location Services > System Services > Significant Locations and ensure it's ON.
b. Ensure you're connected to Wi-Fi for better location accuracy.
c. Restart your iPhone to reset GPS accuracy.
d. Ensure your iPhone is not in Low Battery Mode to increase location accuracy.
Part 5. Conclusion
In this guide, we've covered everything you need to know about iOS Stolen Device Protection feature, including how it works, how to enable it, how to turn off Stolen Device Protection on iPhone, and even troubleshoot issues.
While this feature provides essential protection against unauthorized access and theft, there may be times when turning it off is necessary - especially during repairs, ownership transfers, or when Face ID is malfunctioning.
If you can't turn off Stolen Device Protection due to several reasons, just try third-party tools like TunesKit iPhone Unlocker!