
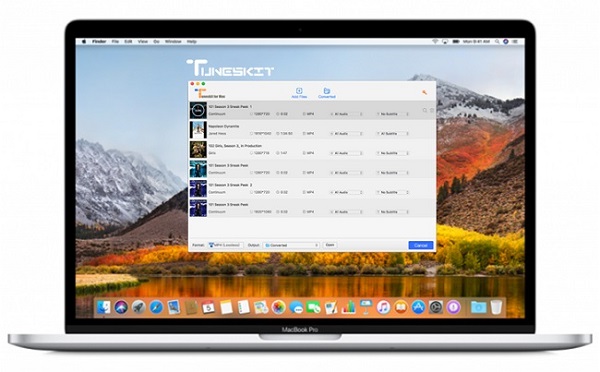
For Mac users who have upgraded your macOS to the latest 10.13 High Sierra, you may noticed that the Mac version of TunesKit DRM removal tools, including the DRM Media Converter and iBook Copy can't seem to work properly as expected. Unfortunately, no fix has yet been found due to the technical difficulty.
Before it's permanently fixed, you are suggested to downgrade your macOS High Sierra to Sierra or lower versions in order to use TunesKit properly. Or alternatively, you can follow some other ways as below to make TunesKit work again on macOS High Sierra so that you can remove DRM from iTunes movies and TV shows without any problem like before. Here we go.
Solution 1. Create Dual-boot macOS via External Drive
This solution is highly recommended as it's much easier for even beginners. By choosing this method, you need to install a previous macOS version supported by TunesKit DRM Media Converter, such as Sierra (or lower) on an external hard drive. In case you don't know how to creat a bootable macOS Sierra installer drive, we collected the whole steps here to show you how to carry out a Mac dual boot with ease.
Note: Before getting started, you are suggested to back up your Mac data as it may clean your startup disk while dual booting. You can back up your data with iCloud or Time Machine.
Step 1Download macOS Sierra
Firstly, you should download the previous macOS Sierra installer from Mac App Store.
Step 2Get an external drive
You can use a USB flash drive or an external hard drive with room for the installer software. Change the name of your drive to Untitled.
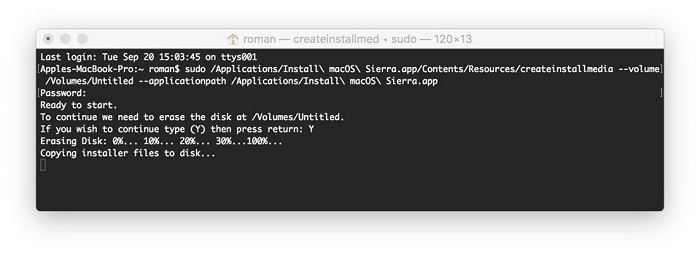
Step 3Create a boot disk with Terminal
Connect the USB or hard drive to your Mac and launch Terminal. Copy and paste the following command to the prompt.
sudo /Applications/Install\ macOS\ Sierra.app/Contents/Resources/createinstallmedia --volume /Volumes/Untitled --applicationpath /Applications/Install\ macOS\ Sierra.app
Enter your user password and Return. You'll be informed that it will erase your drive. Type Y and hit Return to continue. Once your drive is erased, your Mac may ask you if you want to use the drive for Time Machine. Click Don't Use. Terminal will then copy the macOS Sierra installer file to your drive. This will take a few minutes. Once done, quit Terminal.
Step 4Boot from the installer drive
Now you can boot the Mac Sierra from your High Sierra by following the steps below:
Plug your external drive into your Mac. Restart your Mac. Remember to press down on the Option key while the Mac boots. In the Startup Manager, you'll see the available boot drives. Click on the external drive and hit Return.
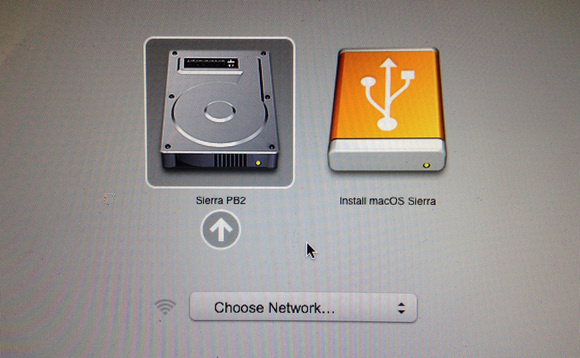
Then your Mac will display an OS X Utilites window. To install Sierra, select Install OS X. If you want to start over and wipe out the data, you need to go into Disk Utility to reformat the internal drive first, and then install macOS Sierra.
After the installation, you can get TunesKit DRM Media Converter for Mac to the bootable macOS Sierra and start to remove DRM from iTunes M4V videos as smoothly as before.
Solution 2. Create a VM macOS Sierra on High Sierra
Installing a virtual macOS Sierra or lower versions such as EI Capitan on High Sierra is another great way to remove DRM from iTunes movies with TunesKit DRM Media Converter. There are many tools that can assist you to create a VM Sierra on your Mac, including VMware Fusion, Parallels Desktop and so on. If you are looking for a free tool, you can follow these steps to learn how to install virtual macOS Sierra on 10.13 with VirtualBox.
Step 1Download virtual hard drive file
Firstly, you should download a virtual hard drive file on TechsViewer. Once downloaded, unzip the macOS 10.12 Sierra Final to get the .vmdk file.
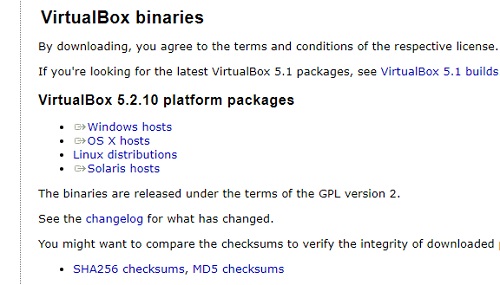
Step 2 Download and install VirtualBox OSX host
Now download VirtualBox OS X Host from its official site and install the file. Follow the same page to download and install Oracle VM VirtualBox Extension Pack for all platforms and install it as well.
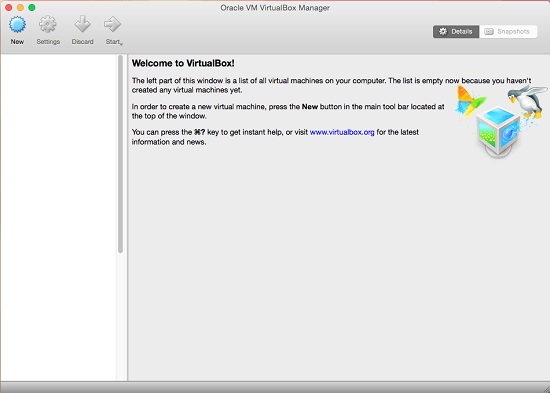
Step 3Create new virtual machine in VirtualBox
Click New button on Oracle VM VirtualBox Manager to create new VM, name it as you like. Choose Mac OS X for Type and macOS 10.12 Sierra (64-bit) for Version and continue.
Choose "Use an existing virtual hard disk file" and locate the one we downloaded and click Create. Then you will be directed back to Oracle VM VirtualBox Manager. Here click Settings, go System-Motherboard and uncheck Floppy.
Click System in meu bar and choose Processor. Set the CPU to at least 2. Then in Display, click Screen and increase the Video Memory to 128MB as required by Apple. Then click OK to save all the settings.
Step 4Boot VM macOS Sierra on High Sierra
Simply click Start to boot Virtual Sierra on High Sierra. Once booted, you will be asked to set the VM as you like.
Congratulations! You can now download and install the latest version of TunesKit DRM Media Converter for Mac on the virtual Sierra in order to remove DRM from iTunes movies.
Solution 3. Install Virtual Windows on macOS High Sierra
The other way to use TunesKit on your macOS High Sierra is installing a virtual Windows OS on Mac. With this method, you can remove DRM from iTunes movies or TV shows with TunesKit DRM Media Converter for Windows that is fully compatible with Windows 10. The following guide will show you how to run Windows as a virtual machine on macOS High Sierra 10.13.
Creating a dual-boot Windows using macOS built-in tool called BootCamp is also good to go. For more details, you can visit this guide.
Step 1Download VMWare
To install Windows on the VM, you need to download VMWare Fusion or Parallels, two well known virtualisation programs. They are not free, however. So you need to buy the copy of the software firstly. If you prefer to freeware, you can download Oracle's VirtualBox. But considering it's fairly complex and difficult to use, we don't encourage beginners to test it out.
Step 2Download Windows 10
Once got the virtualisation software, you need to download an ISO image of the Windows 10 technical preview. You can get this image from Microsoft Windows download center.
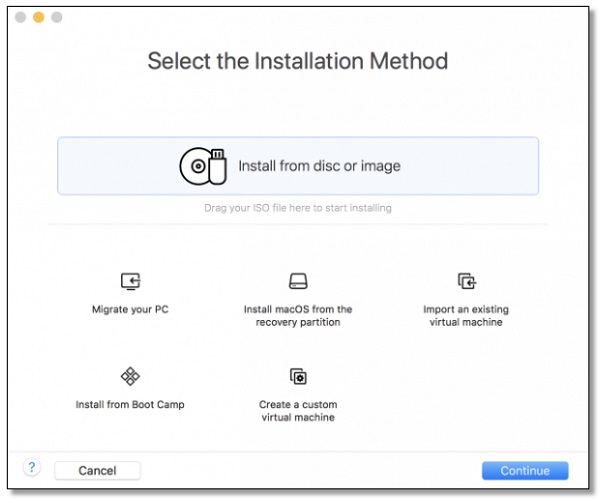
Step 3Launch and install VMware Fusion
On your Mac keyboard, hit Command + Spacebar and type: VMware and press Enter. In the Fusion menu bar, go to File > New. The New Virtual Machine Assistant starts. Select Install from Disc or Image for the Installation Method. Click on Continue.
Step 4Install Windows 10 in virtual machine
In Choose an operating system installation disc or image option, click Use another disc and disc image. Browse to the folder where the downloaded ISO disc image is located. Select the Windows 10 ISO disc image and click Open. Next, choose Use Easy Install option. Enter your Account Name, Password and Windows Product Key to continue.
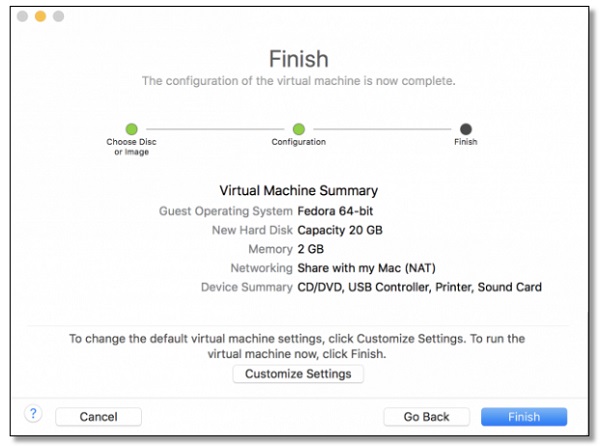
Then select the appropriate integration in the next screen. Click Finish to save the virtual machine and wait for the installation begins.
Once the virtual Windows 10 is installed successfully on your Mac, you can set the OS as Windows 10 while starting up. Then launch TunesKit DRM Media Converter for Windows to bypass DRM from iTunes movies losslessly.

Andy Miller joined TunesKit since 2013. He likes to spend his time to work on some new skills and gadgets. He's a writer as well as a computer geek.