
TunesKit users who have already upgraded their macOS to the latest 10.13 High Sierra may find that the software doesn't work properly under this specific Mac system. Unfortunately, currently TunesKit programmers are still working on this problem and the date when the 10.13 incompatibility issue will be fixed remains unknown. Therefore, in order to make TunesKit DRM removal products for Mac work again before the fix comes out, the best solution is to downgrade the macOS High Sierra to macOS Sierra supported well by TunesKit for Mac. Here in the following post, we'll show you instructions on how to easily and safely remove macOS High Sierra and install the previous Sierra 10.12 again
But before heading over to the guide, make sure to back up your Mac using Time Machine. (Apple Menu → System Preferences → Time Machine.) Once you have downgraded the macOS, you will be able to restore the backup. Get ready to downgrade macOS High Sierra 10.13 to macOS Sierra 10.12? Here we go.
Step 1. Create a bootable drive of macOS Sierra
Before you erase macOS High Sierra from your computer, download macOS Sierra from the Mac App Store. It should be in your purchase list, or you can simply search for it in the Mac App Store.
Step 2. Erase macOS High Sierra
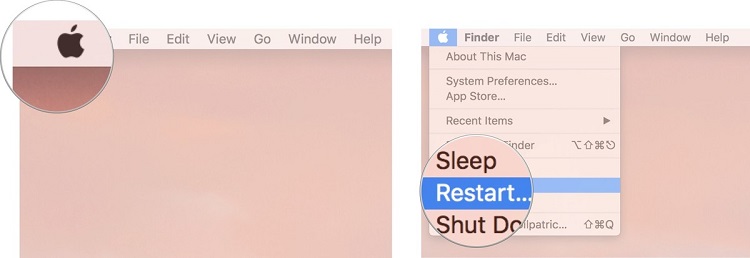
1. Click on Apple icon at the top-left corner of the screen on your Mac and select Restart. While the Mac restarts, hold down Command+R.
2. From the OS X Utilities, click Disk Utility.
3. Click Continue. Then, you have to click Startup Disk.
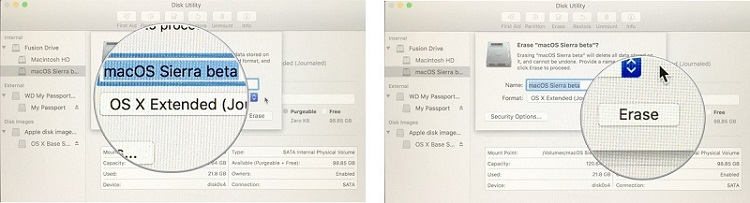
4. Click Erase. Now, type in for the macOS High Sierra file which you want to get rid of.
5. Select Mac OS Extended from the Format list and click on Erase.
After the process is complete, quit Disk Utility from the dropdown menu in the upper left corner of the screen to go back to the OS X Utilities selector.
Step 3. Reinstall macOS Sierra
After erasing macOS High Sierra, you'll need to reinstall macOS Sierra back on your Mac now.
1. Connect your Mac to the internet via Wi-Fi or Ethernet.
2. Click on the Apple icon in the upper left corner of the screen.
3. Select Restart from the dropdown menu.
4. Hold down Option while your computer restarts. This will send you to the option to select a startup disk.
5. Select macOS Sierra from the list of startup disk options. macOS Sierra will begin installing on your Mac.
6. Click Continue in the macOS Sierra installation window.
Then your Mac will restart when the process is completed.
Step 4. Restore your data from Time machine backup
Once you've re-installed macOS 10.12 Sierra, you can get back all your files and data by restoring from the most recent Time Machine backup.
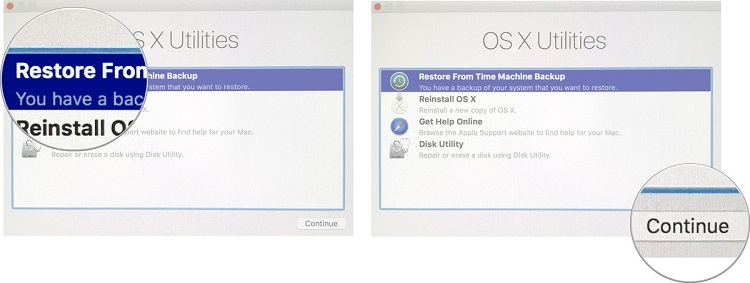
1. Restart your Mac. Hold down Command+R and then click Restore from Time Machine Backup from the OS X Utilities menu.
2. Select the source where your Time Machine backup is stored, such as the connected hard drive, and then click on Continue.
The process can take a while depending on the size of the backup. So stay patient and do not cause interruptions during the process.

Dan Miners is the PR manager of TunesKit since 2012. He is in charge of all public relations, advertising, affiliate, etc for TunesKit.